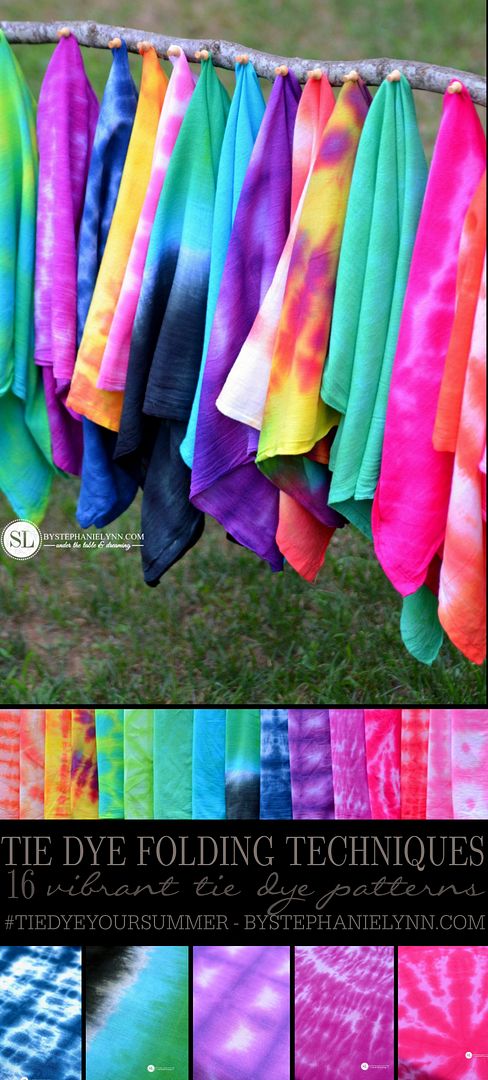
Different Types of Tie Dye Knots
Tie Dye Folding Techniques | 16 vibrant tie dye patterns #tiedyeyoursummer #michaelsmakers |Although tie dye has been around for ages, it is one crafting trend that will never get old. Creating the colorful deigns and unique patterns is much easier than you think and a perfect activity that can be enjoyed by all.
While there really are no rules when it comes to tie dying, I have found a few tips and tricks along the way, that produce some fantastic results.
Last week I shared our Tie Dye Party set up and I'm back today with some
simple Tie Dye Folding Techniques.
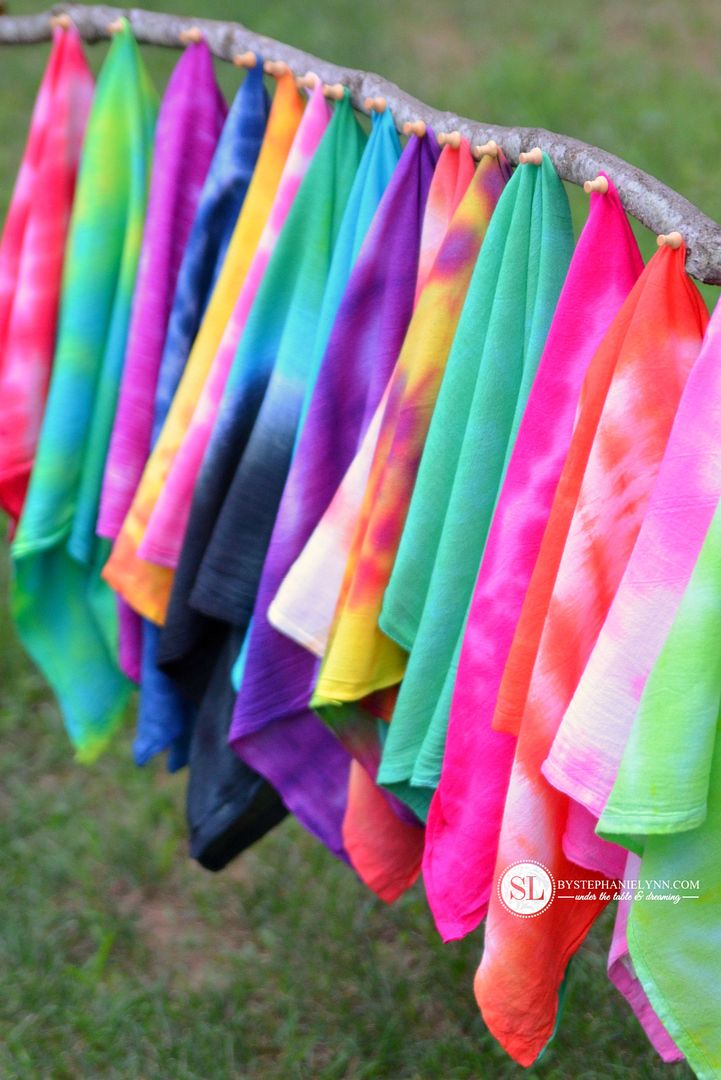
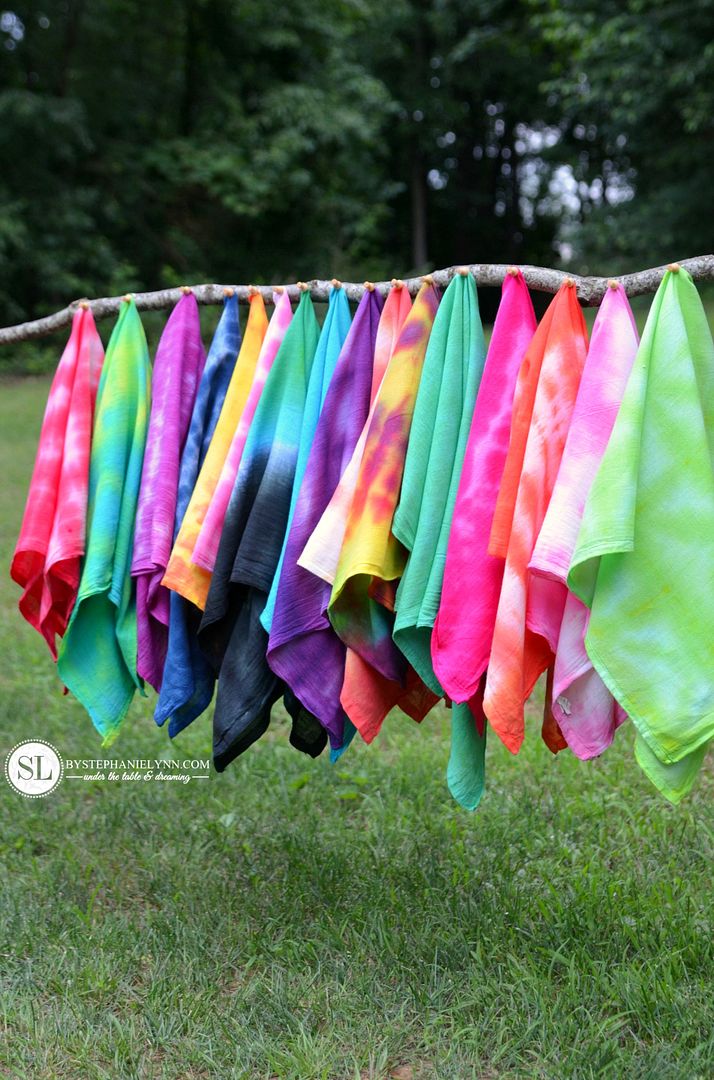
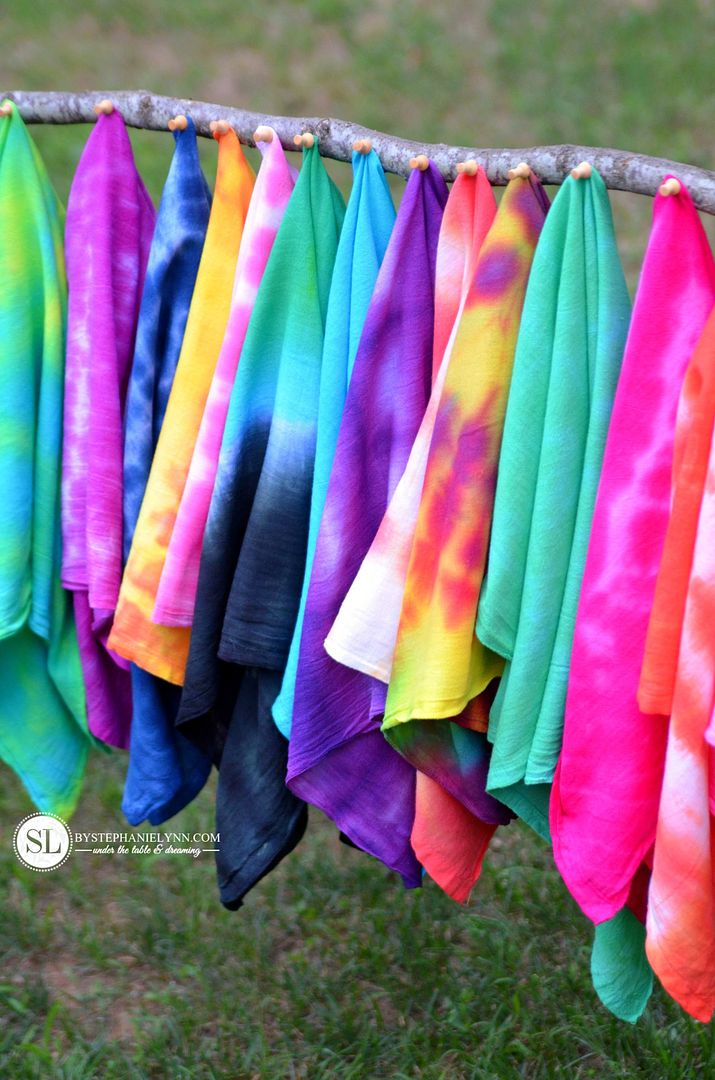
All of the designs in this post were created with these 100% cotton Flour Sacks.
They make great dish towels (tea towels) and the tie dye brings a touch of color & fun to your kitchen decor.
The dyes used in all of the Tie Dye Techniques below were from the Tulip® One-Step Tie-Dye Party Kit.
The kit can be found at Michaels, along with the larger and wider Tulip® Rubber Bands.
A few tips to keep in mind before you begin:
- Dedicate some time to folding and bundling the fabric. The 'folds' (or bundles) are one of the main components in creating unique tie dye patterns as it prevents the dye from reaching certain areas – which in return, create resists.
- E ach fold you make will create a line in your pattern. For smaller patterns, keep the folds narrow – for larger patterns, made the folds wider.
- Creasing and folding the fabric creates geometric-type patterns and stripes. Crumbling, scrunching or twisting the fabric create more organic-like patterns and spirals.
- When securing the fabric, make sure the rubber bands are really tight. This will not only will hold the fabric together, but will help prevent the die from seeping through the folds, creating crisp resists.
- The other main component of creating unique tie dye designs is choosing the right colors. Different color dye applied close to each other will seep together and create a 'new' color.
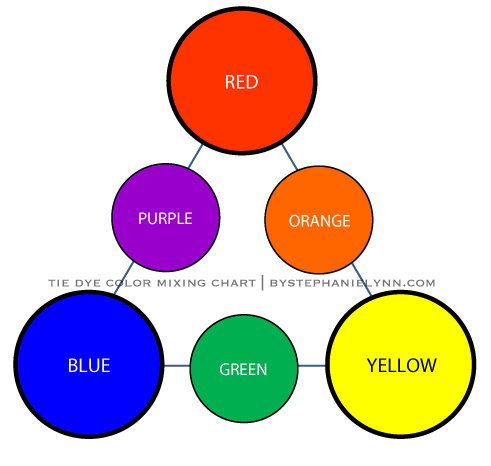
- When combining colors, stick with the primary basics.
- Avoid combining secondary colors – like orange and green, green and purple, & purple and orange – which will result in muddy brown hues.
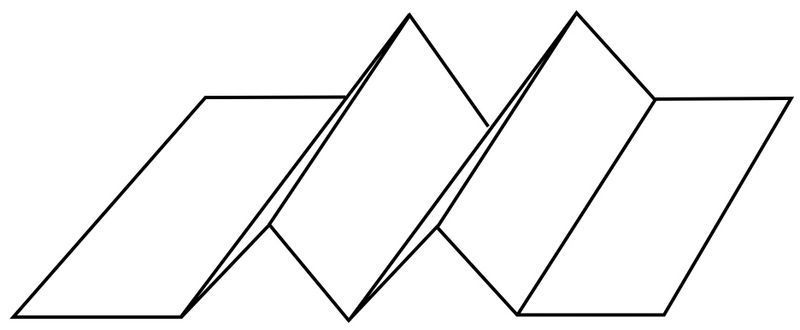 For reference: The term 'accordion fold' is used below in several of the techniques. This simply means folding the fabric in a zig-zag pattern, creating a series of pleats, as shown above.
Crumple Tie Dye Technique
Lay the fabric flat.
Begin scrunching the fabric together with your fingers.
Continue scrunching the fabric until you have everything in a crumpled mound.
Secure tightly with rubber bands.
Apply the dye to the fabric.
Flip the fabric over and repeat on the backside.
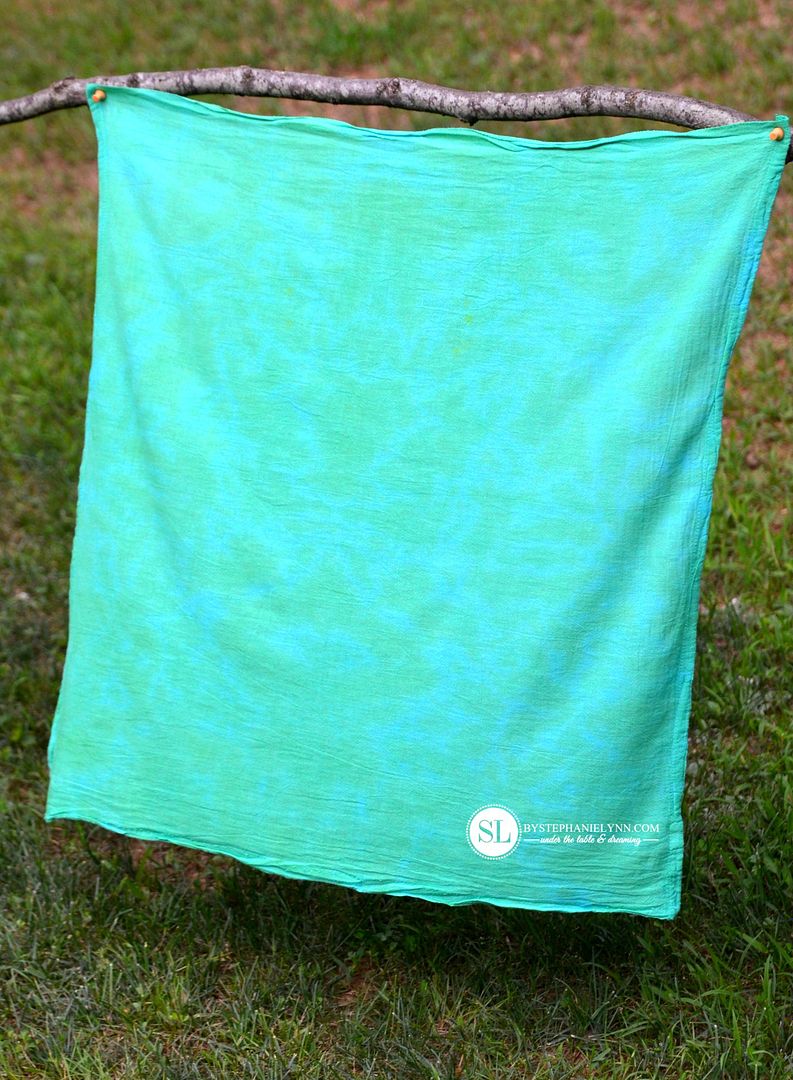
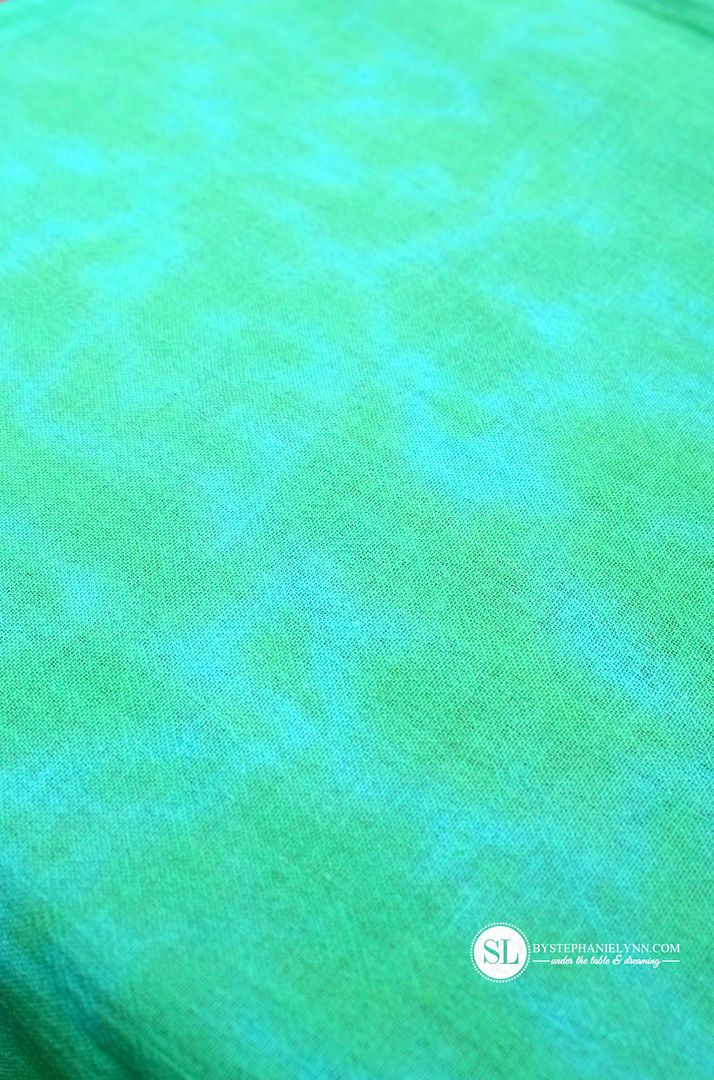
Crumble Tie Dye Results
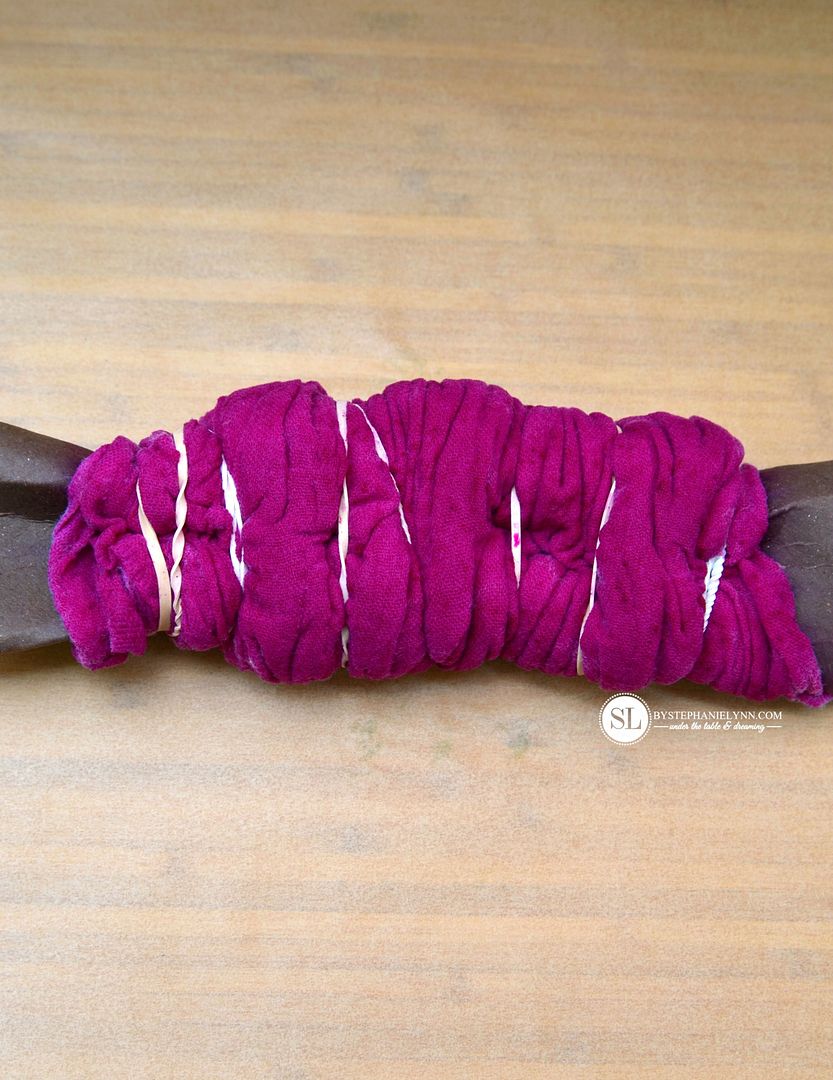
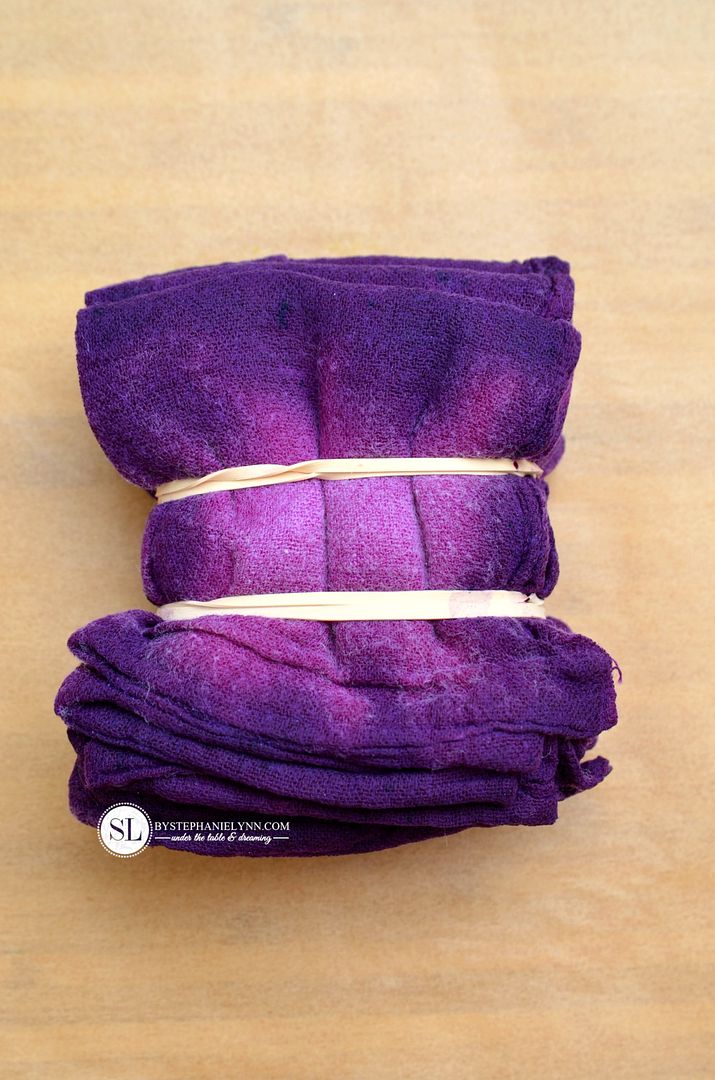
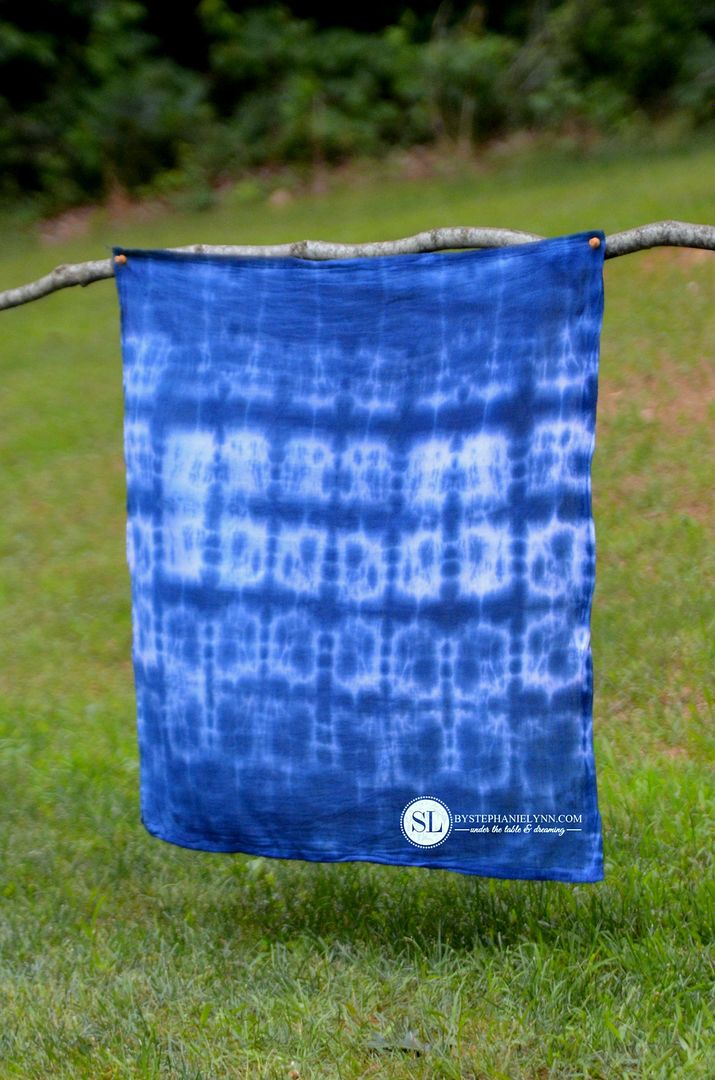
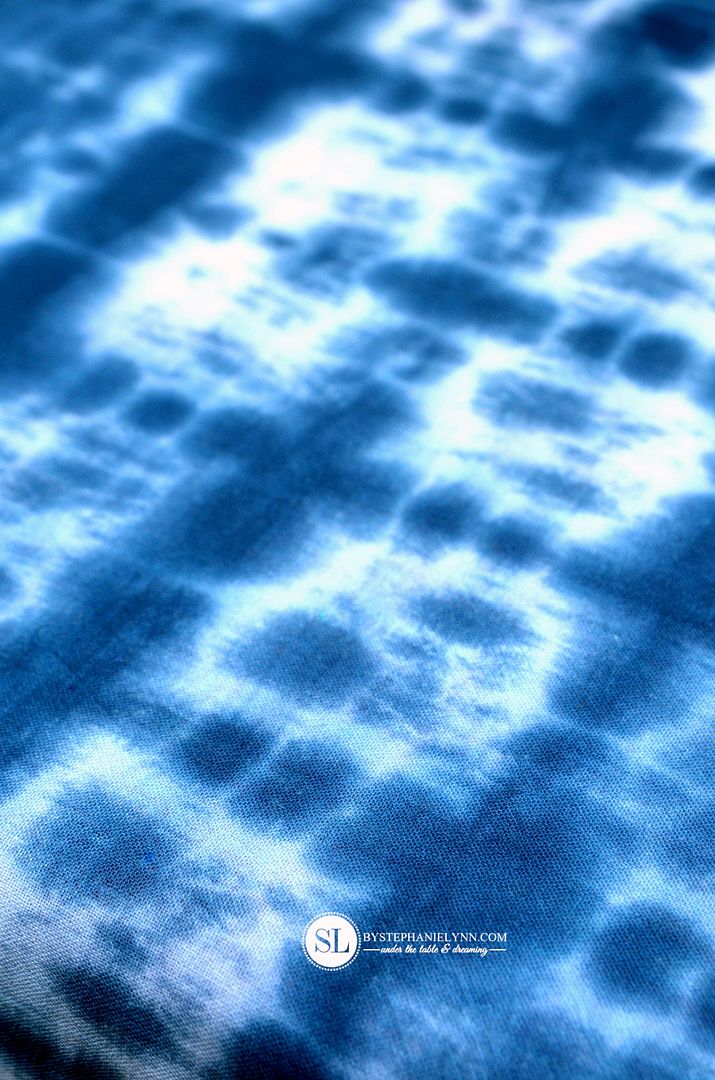
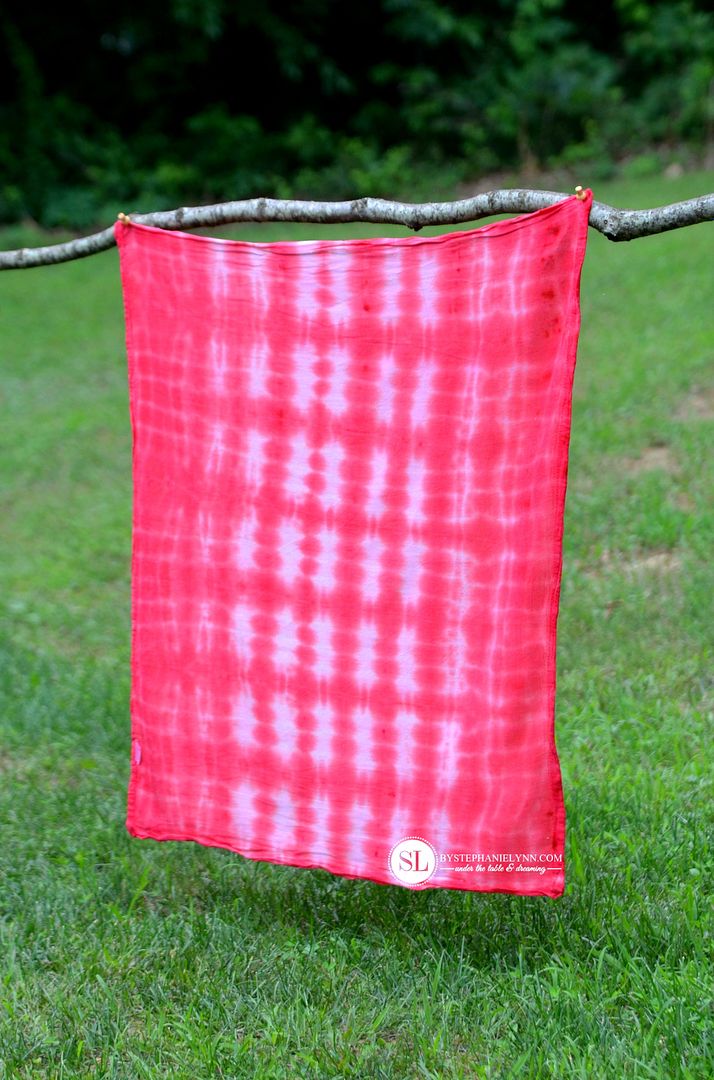
Shibori Tie Dye Technique
Lay the fabric flat.
Roll the fabric around a tube – we used a paper towel roll.
Tightly scrunch both ends of the fabric toward the center.
Secure with rubber bands.
Apply the dye to the fabric.
Rotate the tube and continue applying the dye until the fabric is completely saturated.
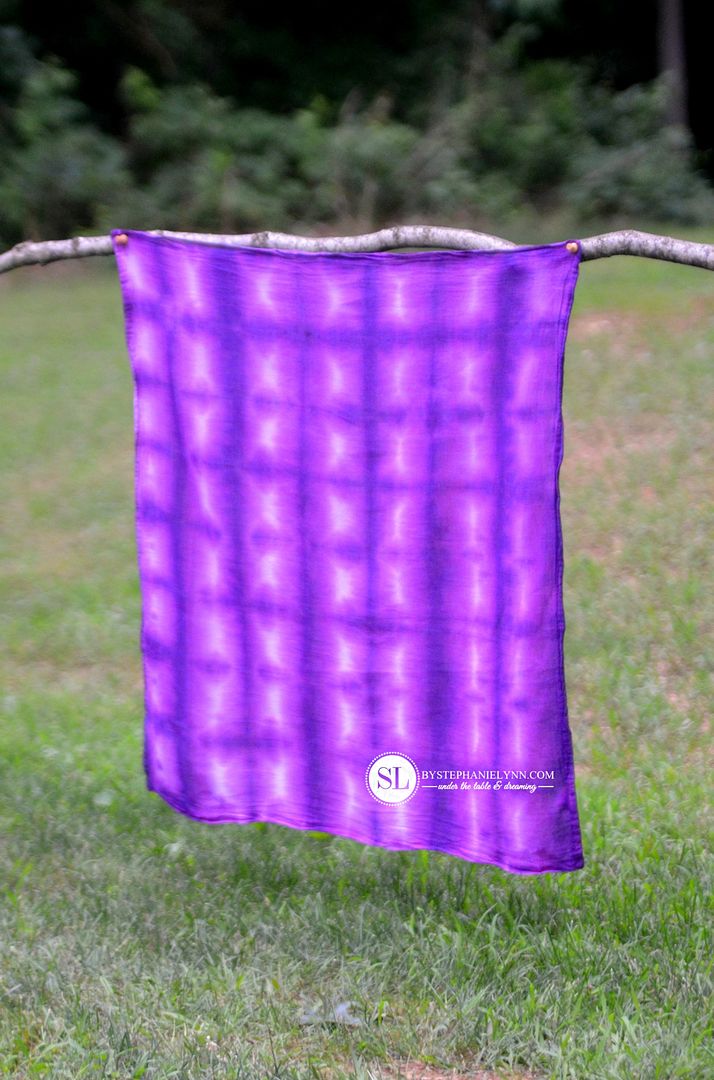
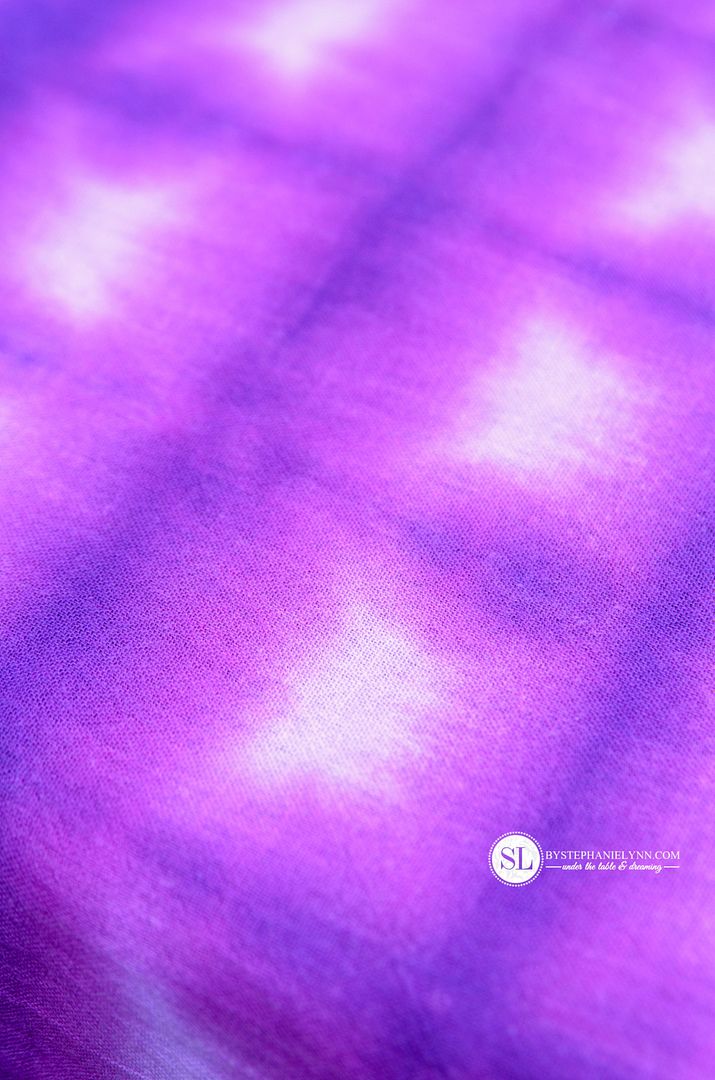
Shibori Tie Dye Results
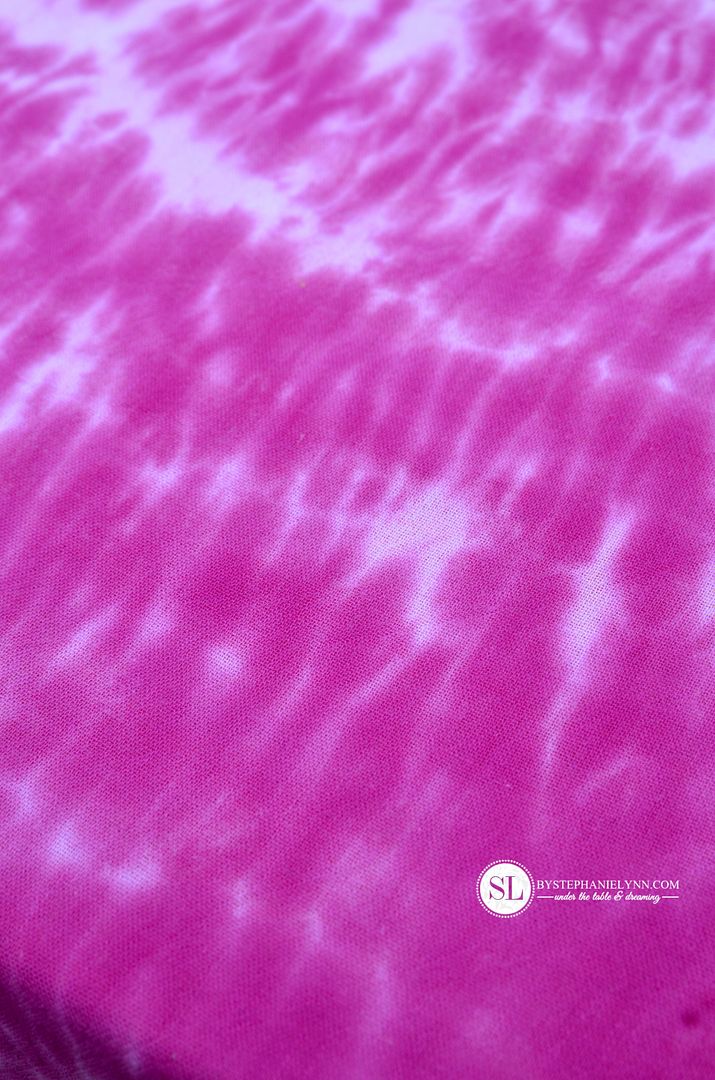
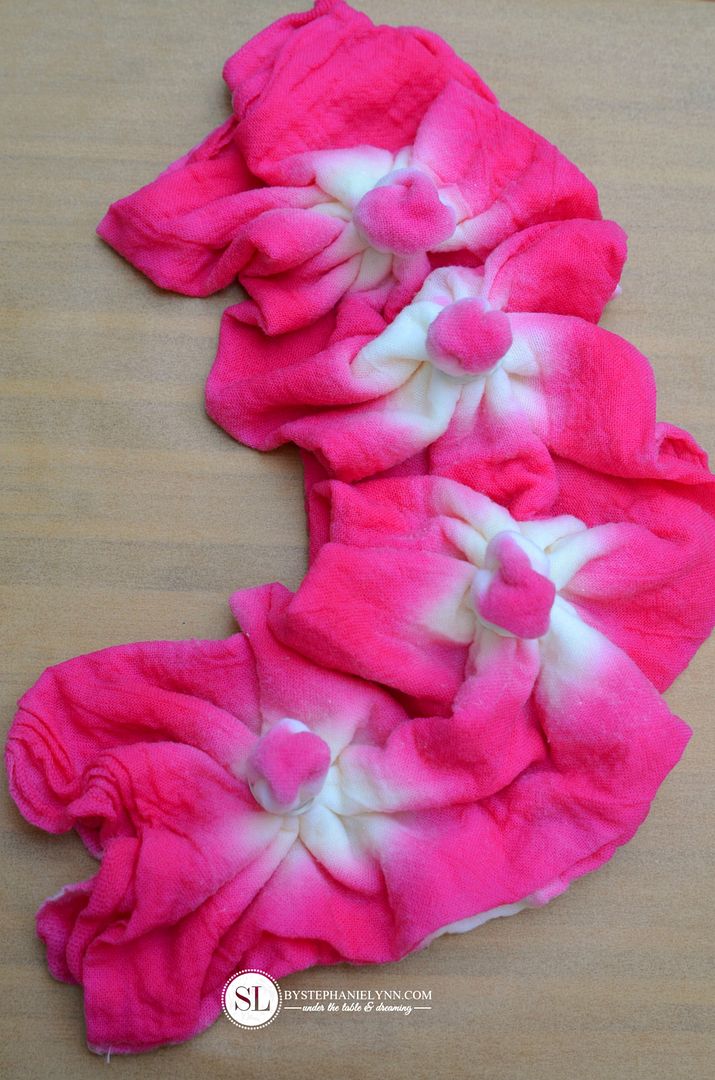
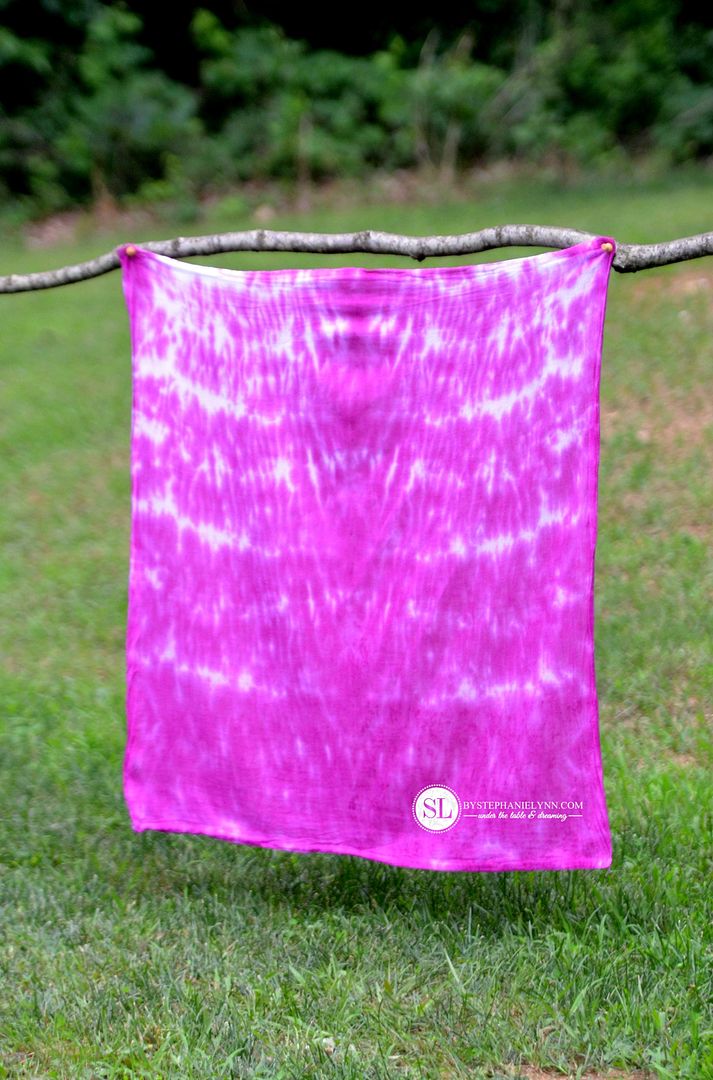
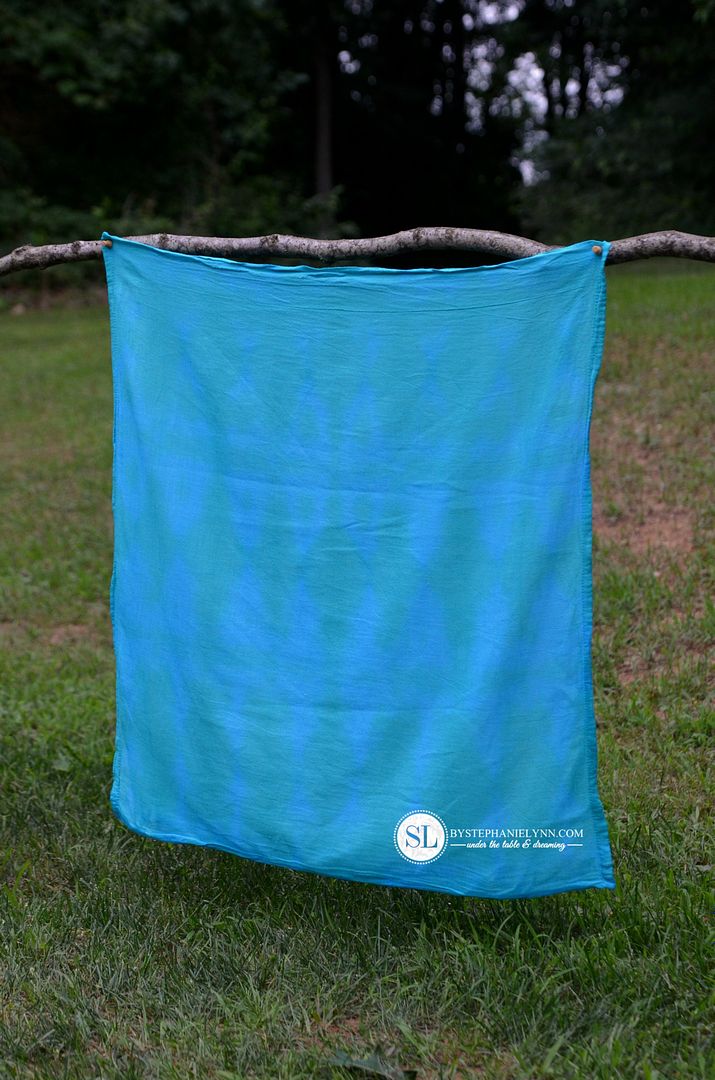
Sunburst Tie Dye Technique
Lay the fabric flat.
Fold the fabric in half.
Fold the fabric in half, again, lengthwise.
To create the sunbursts pinch the fabric and pull upward, 1 to 2 inches. Secure the fabric with a rubber band and repeat for the desired number of sunbursts.
Apply the dye to the outer edges of the fabric, the fabric between each sunburst and the center of each sunburst.
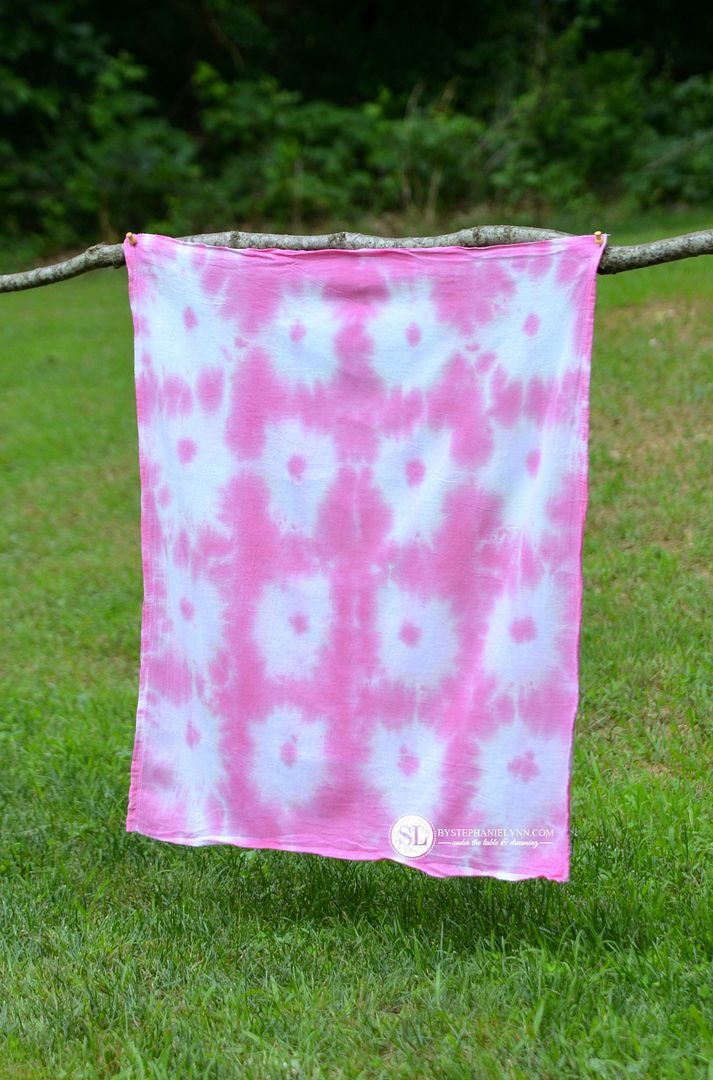
Sunburst Tie Dye Results

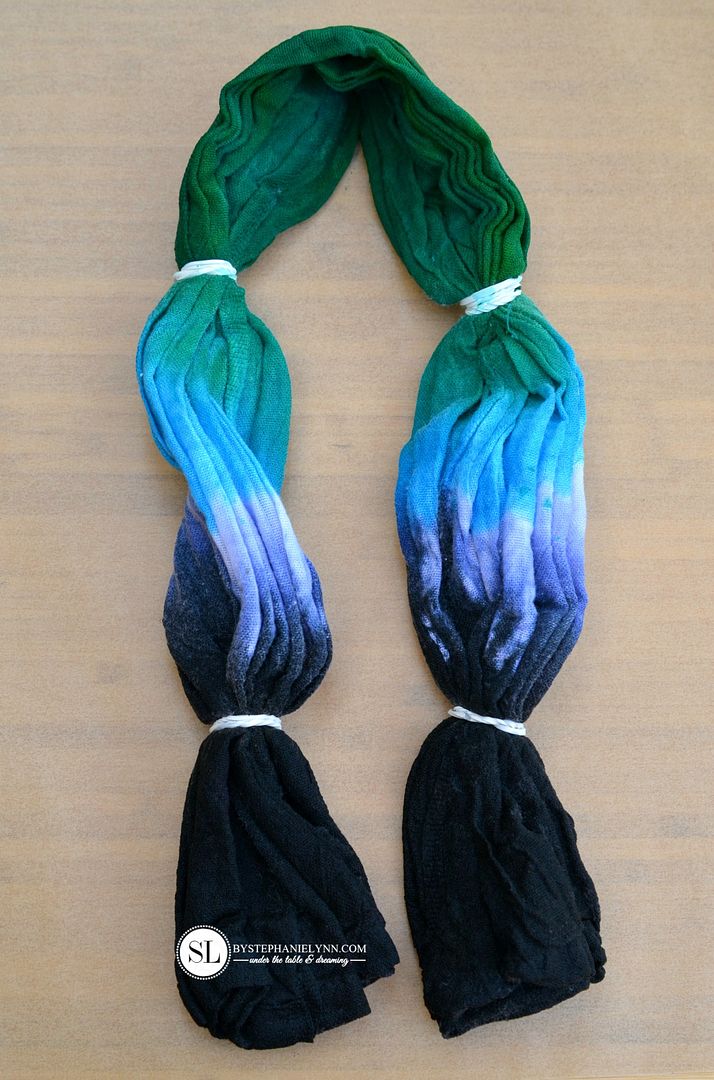
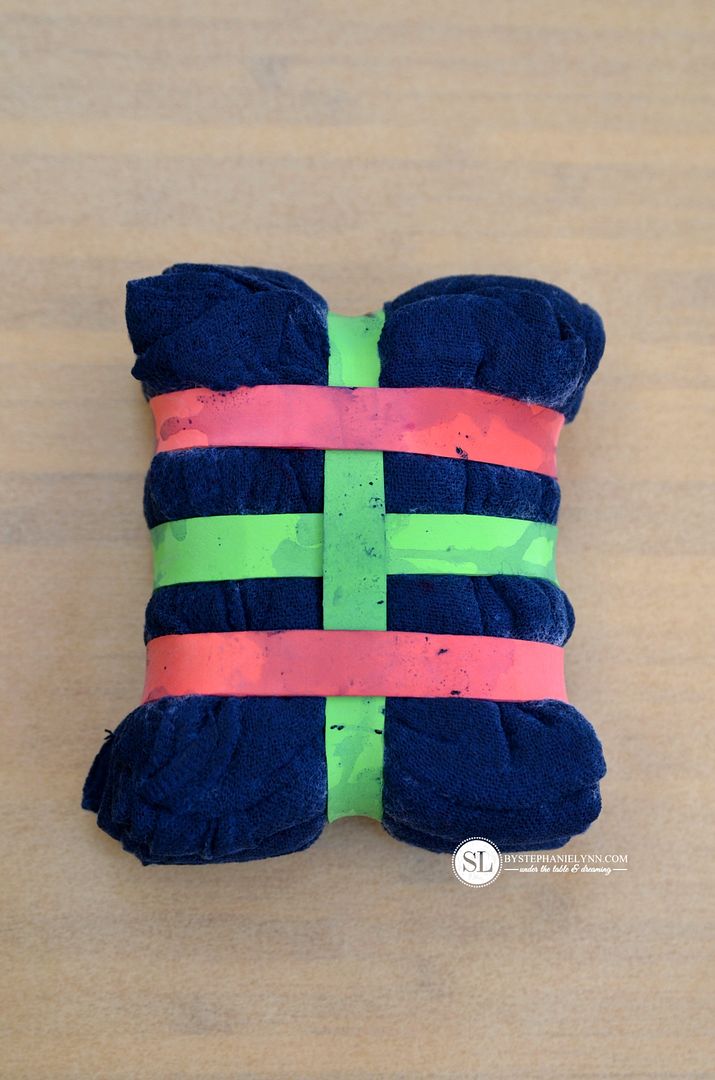
Stripes Tie Dye Technique
Lay the fabric flat.
Accordion fold the fabric from the bottom up.
Secure with rubber bands.
Apply the dye to the fabric.
Flip the fabric over and repeat on the backside.
*For this particular design only two colors of dye were used. Black dye was applied to the ends, completely saturating the fabric up to the rubber bands. Then green dye was applied to the center section – completely saturating the fabric, up to the rubber bands. The fabric was then flipped over and the dye was repeated on the backside. As the dye processes it will seep through the fabric and create the ombre effect, as shown above.
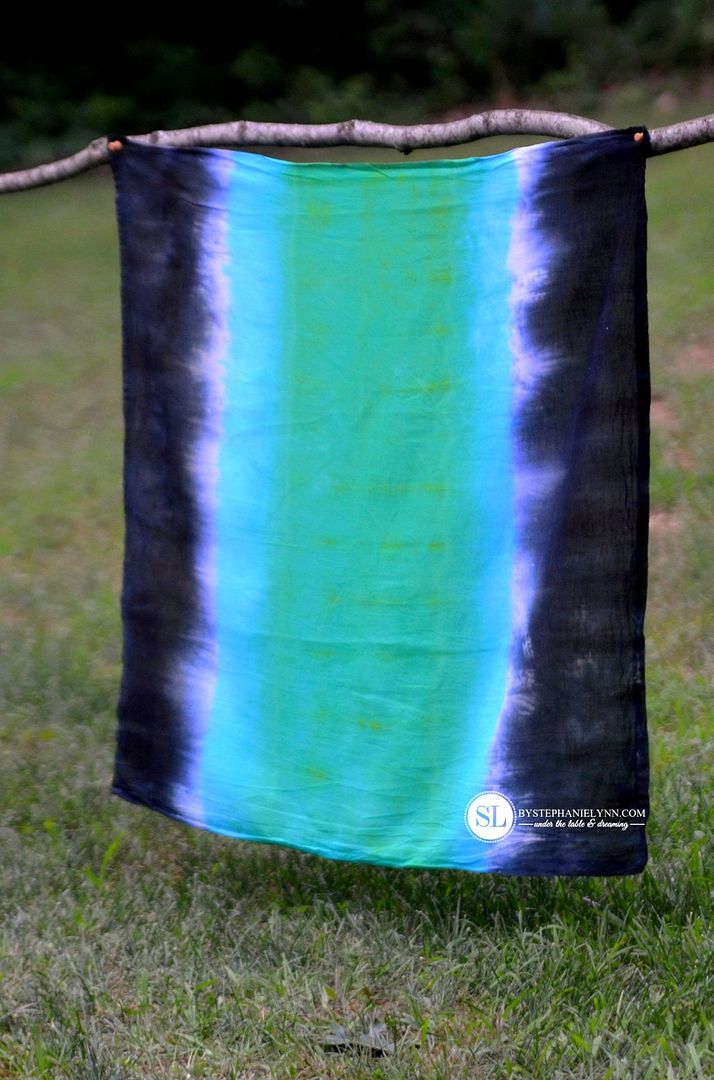
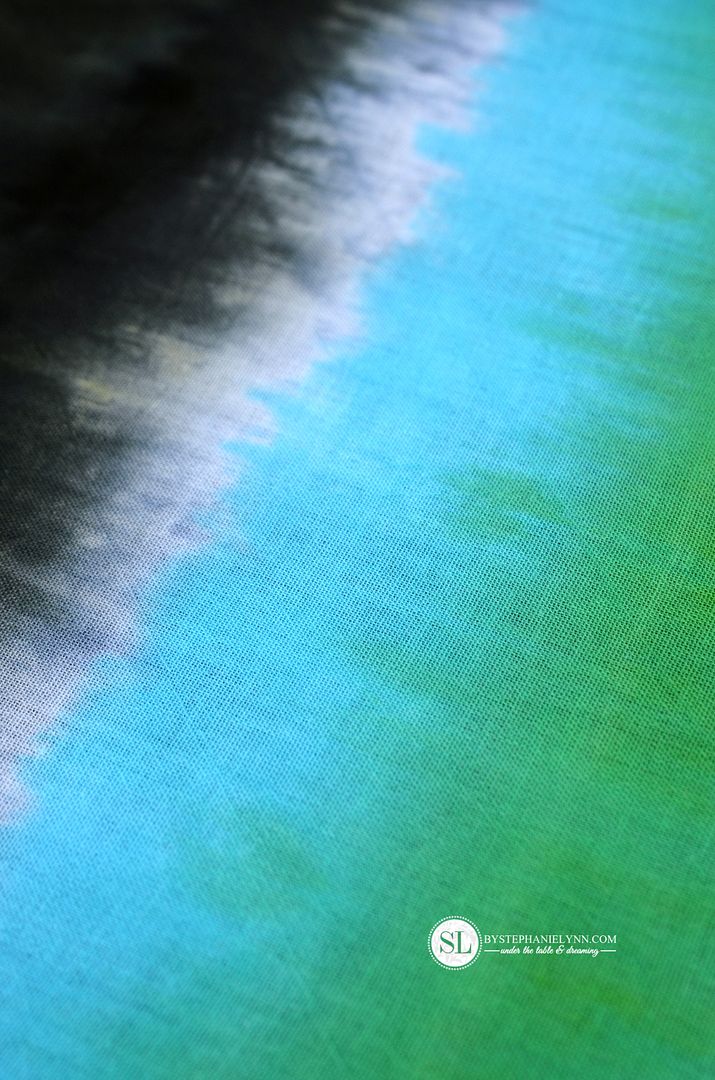
Stripes Tie Dye Results

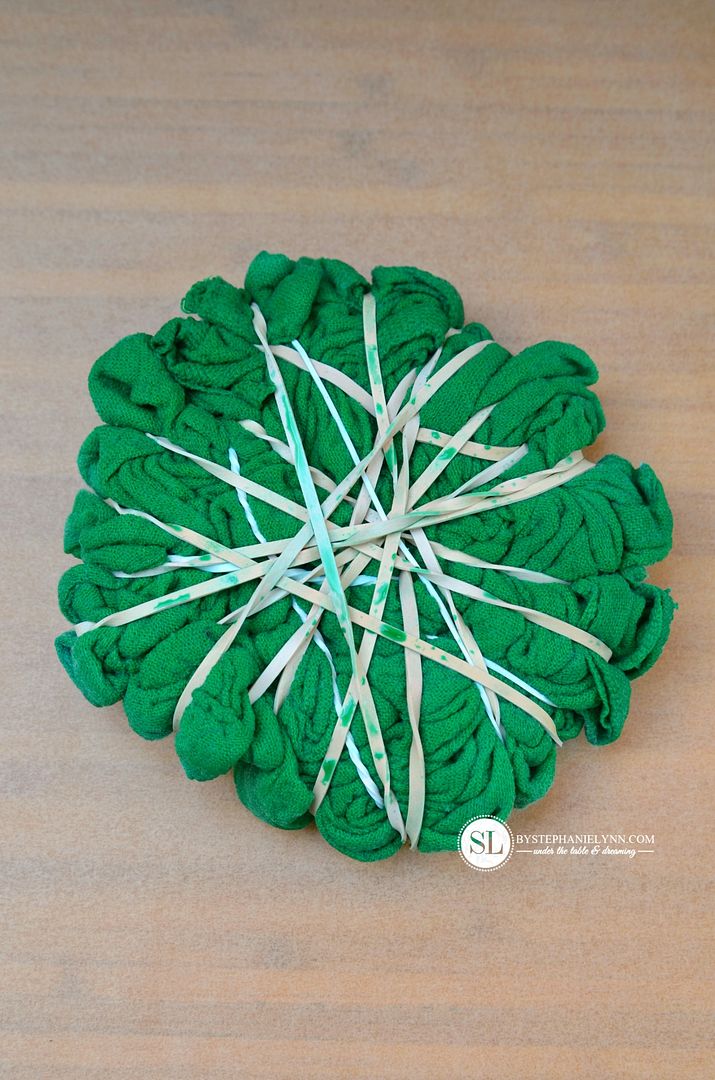
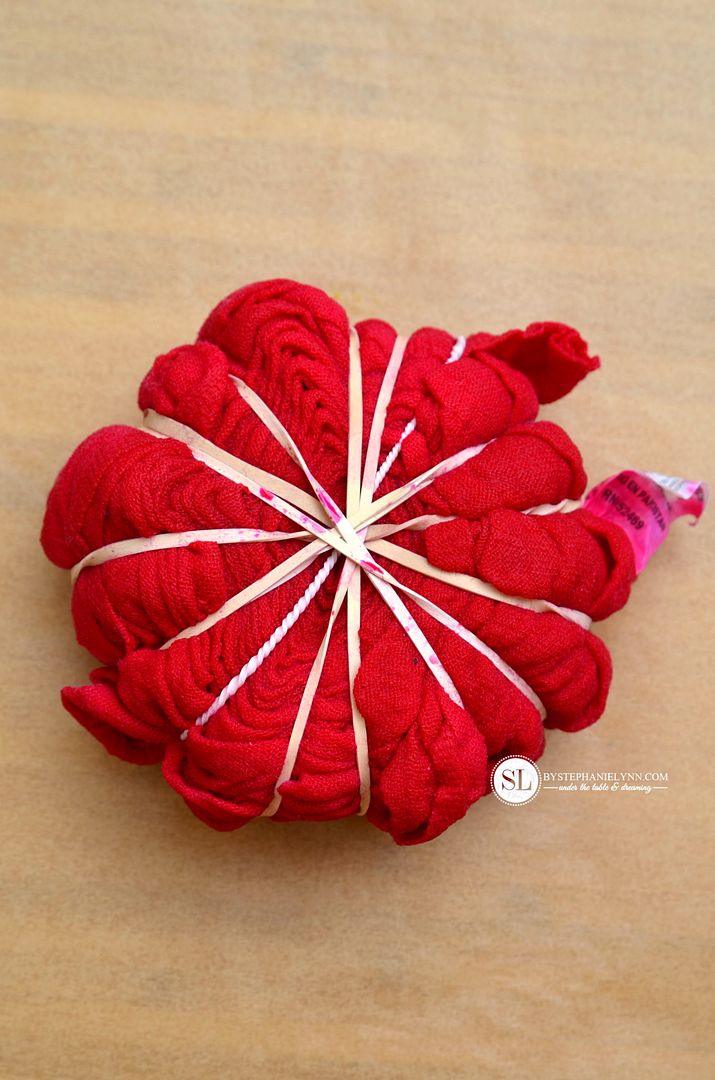
Spiral Tie Dye Technique
Lay the fabric flat.
Pinch the fabric in the center.
Begin twisting the fabric in a circular motion and continue until all of the fabric is in a spiral shape.
Secure the spiral with three rubber bands, creating a wedge effect, as shown above.
Apply the dye to the fabric.
Flip the fabric over and repeat on the backside.
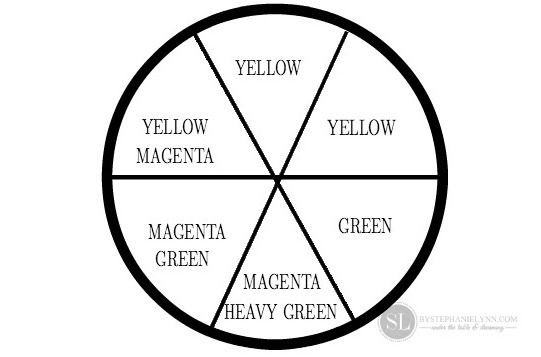
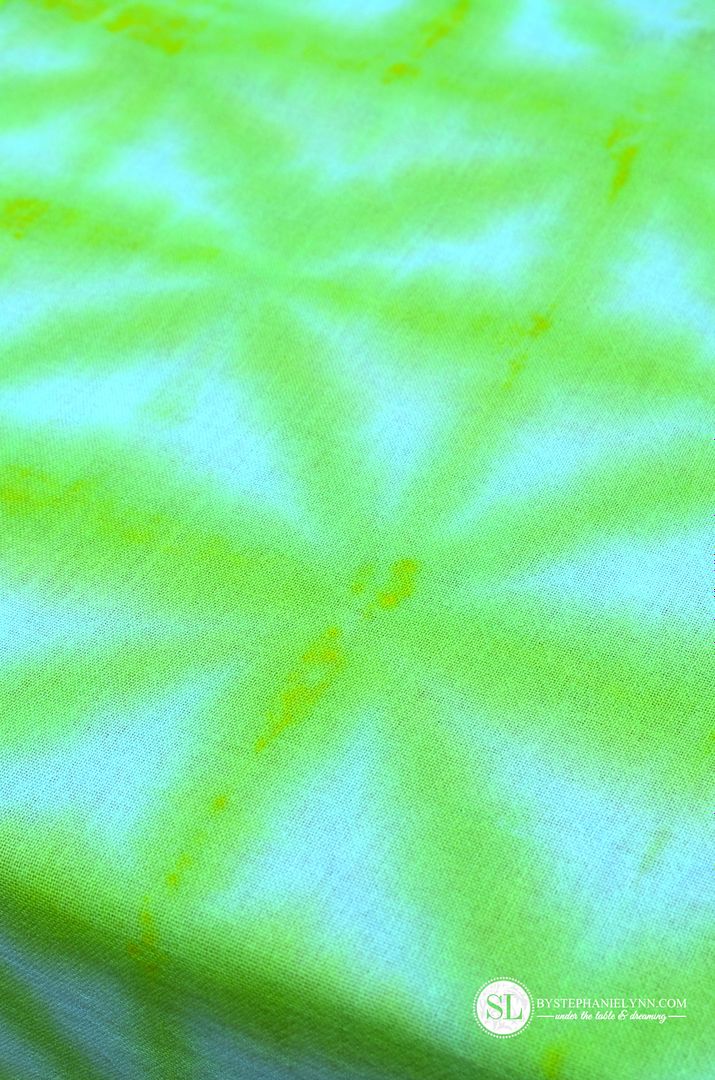
* For this particular design three different colors of dye were used. Yellow dye was applied to three consecutive wedges. Then, overlapping one of the yellow wedges, magenta dye was applied to three consecutive wedges. Lastly, overlapping two of the magenta wedges, green dye was applied to three consecutive wedges, with a heavy concentration on the center wedge – as shown above. The fabric was then flipped over and the dye was repeated on the backside.
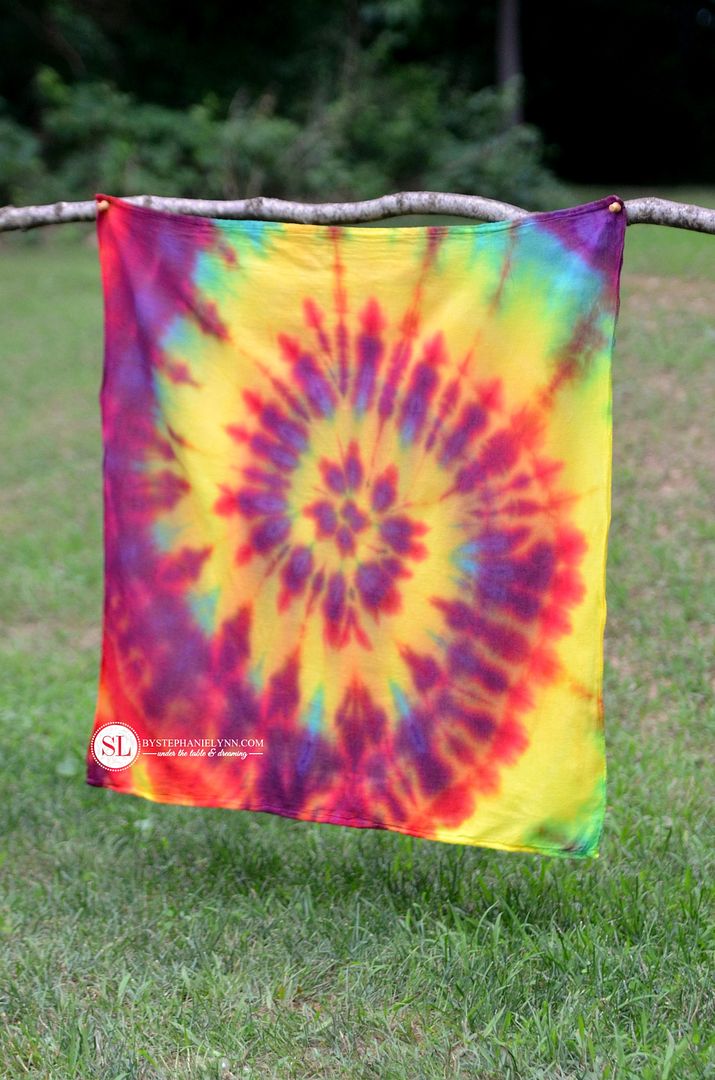
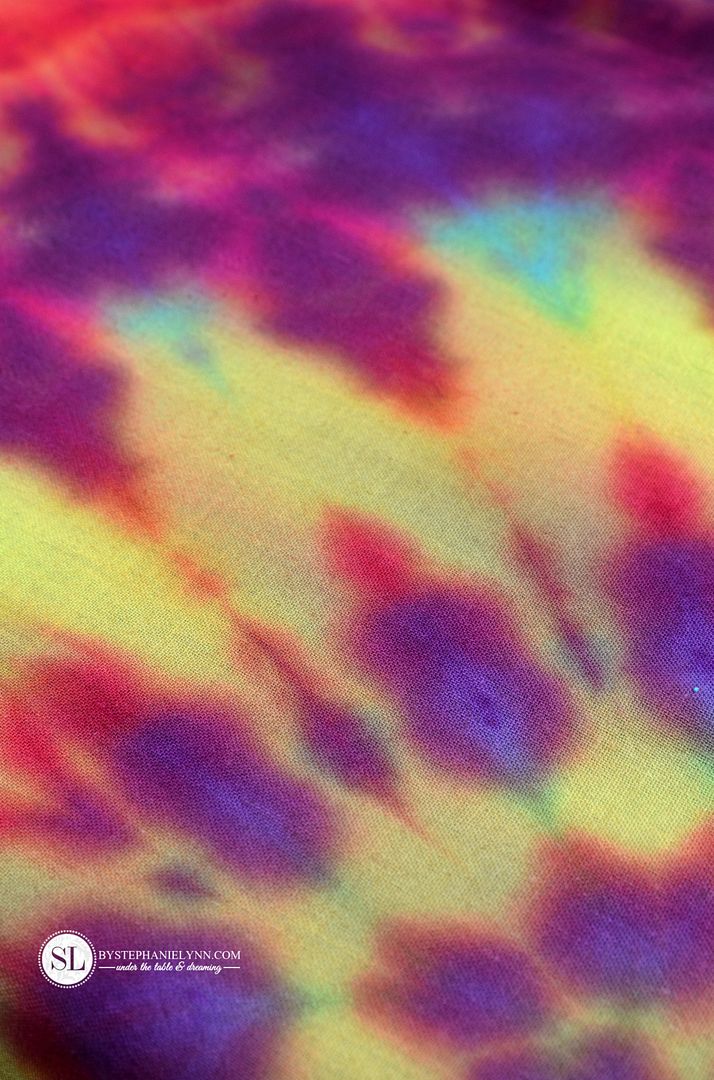
Spiral Tie Dye Results
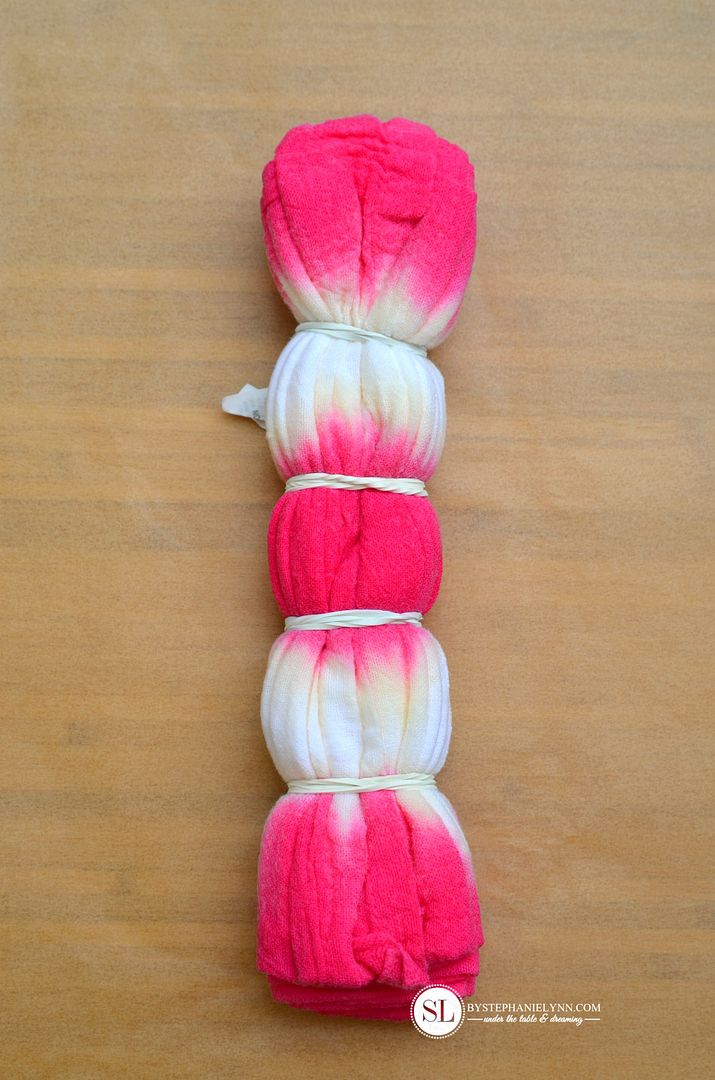
One Color Spiral Tie Dye Technique
Lay the fabric flat.
Pinch the fabric in the center.
Begin twisting the fabric in a circular motion and continue until all of the fabric is in a spiral shape.
Tightly secure the spiral rubber bands.
Apply the dye to the fabric.
Flip the fabric over and repeat on the backside.

One Color Spiral Tie Dye Results

Bullseye Tie Dye Technique
Lay the fabric flat.
Pinch the fabric in the center.
Pull the fabric upward into a cone shape.
Secure with rubber bands.
Apply the dye in sections.
Flip the fabric over and repeat on the backside.
* For this particular design one color of dye was used. Dye was applied to each section, leaving the fabric near each of the rubber bands untouched. The fabric was then flipped over and the dye was repeated on the backside. As the dye processes, it will seep through the fabric and create the ombre effect, shown above.

Bullseye Tie Dye Results


Folded Tie Dye Technique
Lay the fabric flat.
Fold the fabric in half.
Fold the fabric in half again, then fold in half once more. At this point you will have a rectangle shape.
Fold the fabric in thirds.
Apply one color dye to the outer folded edges – then using a second color, apply dye to the four corners and the center.
Flip the fabric over and repeat on the backside.
Folded Tie Dye Results
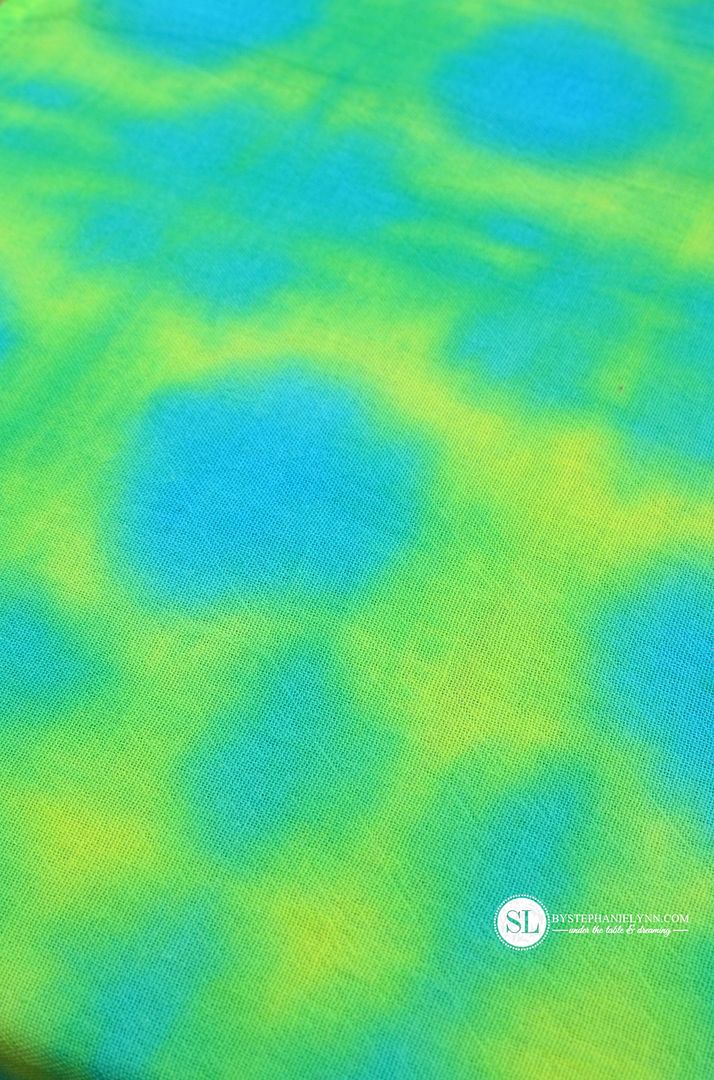
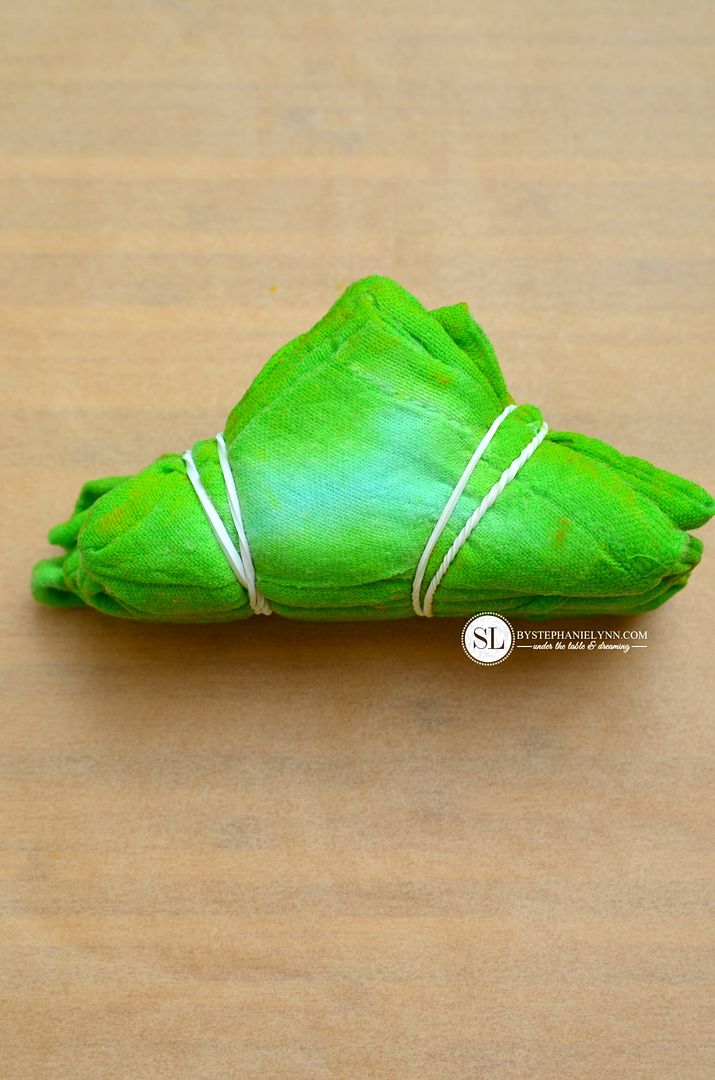
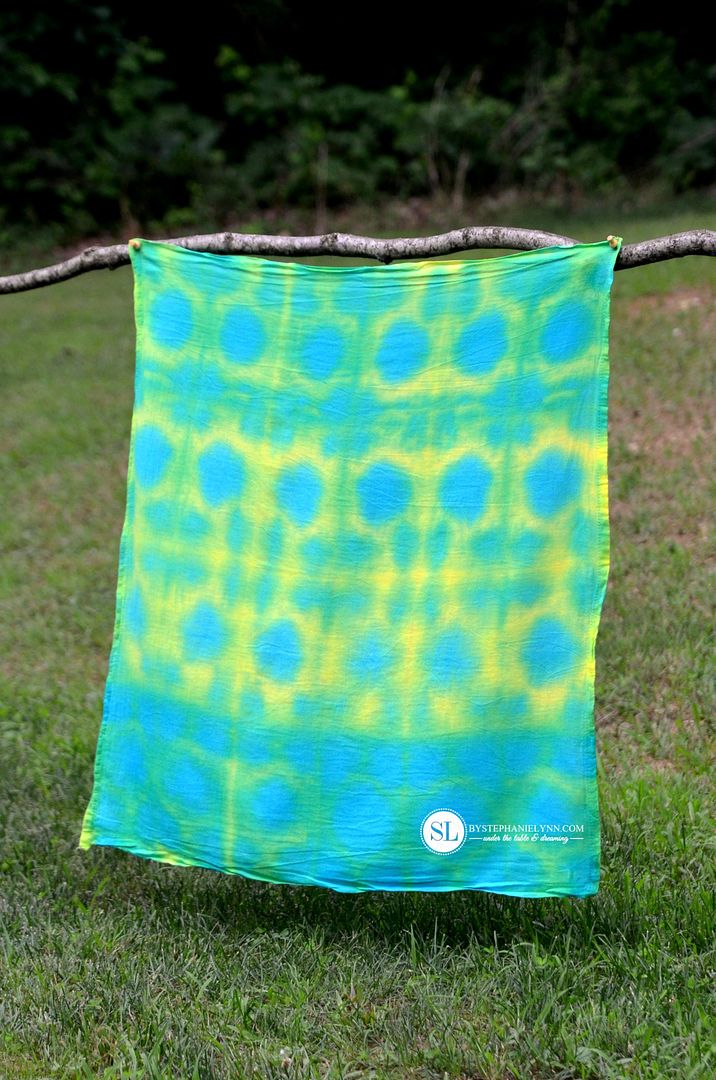
Diamond Pattern Folded Tie Tye Technique
Lay the fabric flat.
Accordion fold the fabric from the bottom up.
At this point you will have a long strip of folded fabric.
Turn the strip in a vertical position and fold the bottom corner of the fabric at a 90-degree angle, creating a triangle shape.
Using that triangle shape as a guide, repeat an accordion fold until you are left with a single 'triangle' of fabric – as shown above.
Tightly secure the triangle with rubber bands.
Apply the dye to the fabric.
Flip the fabric over and repeat on the backside.
* For this particular design one color of dye was used. Lime green dye was applied to the outer edges of the triangle, leaving the center untouched. The fabric was then flipped over and the dye was repeated on the backside. As the dye processes it will seep through the fabric and create the ombre effect shown above.
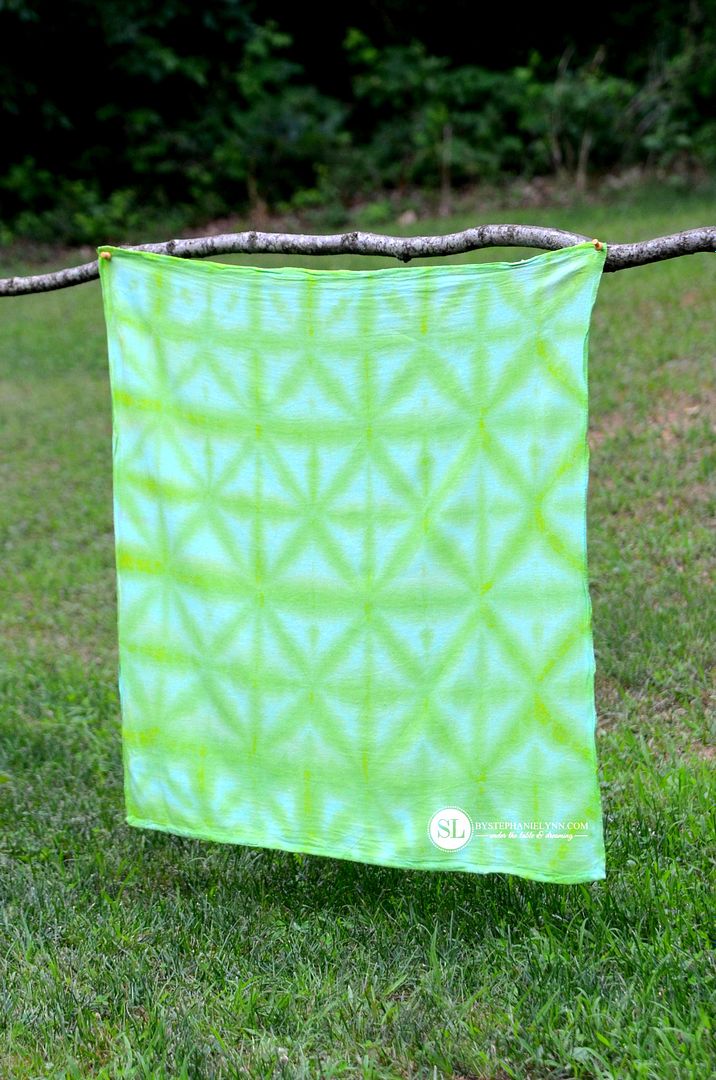
Diamond Pattern Folded Tie Tye Results
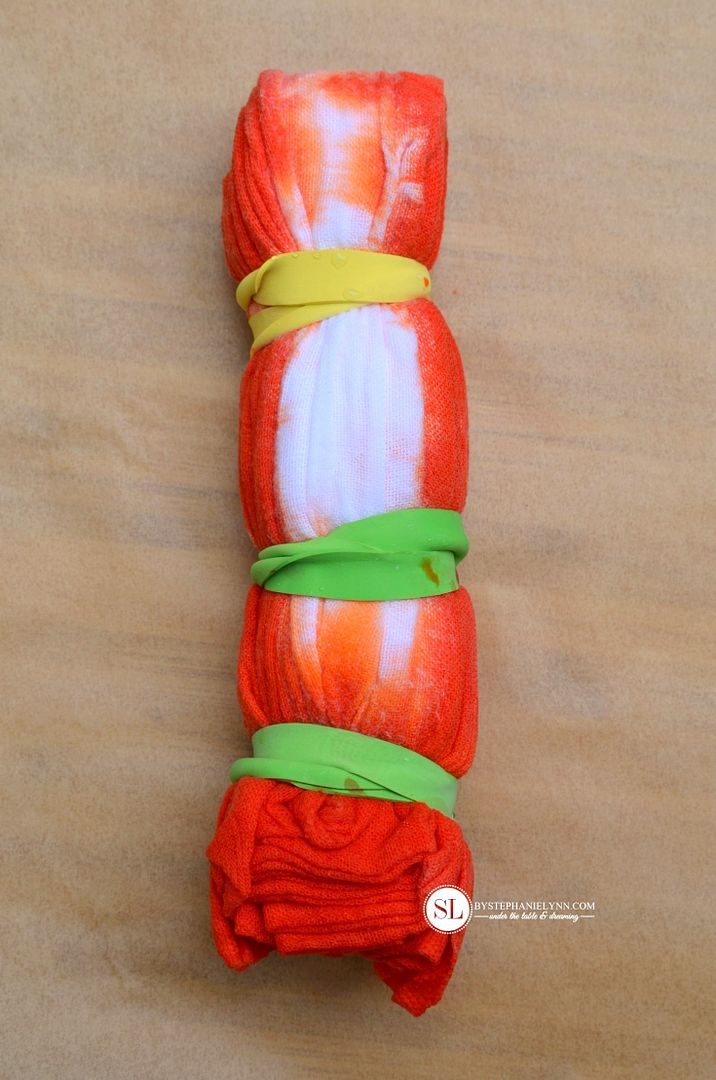
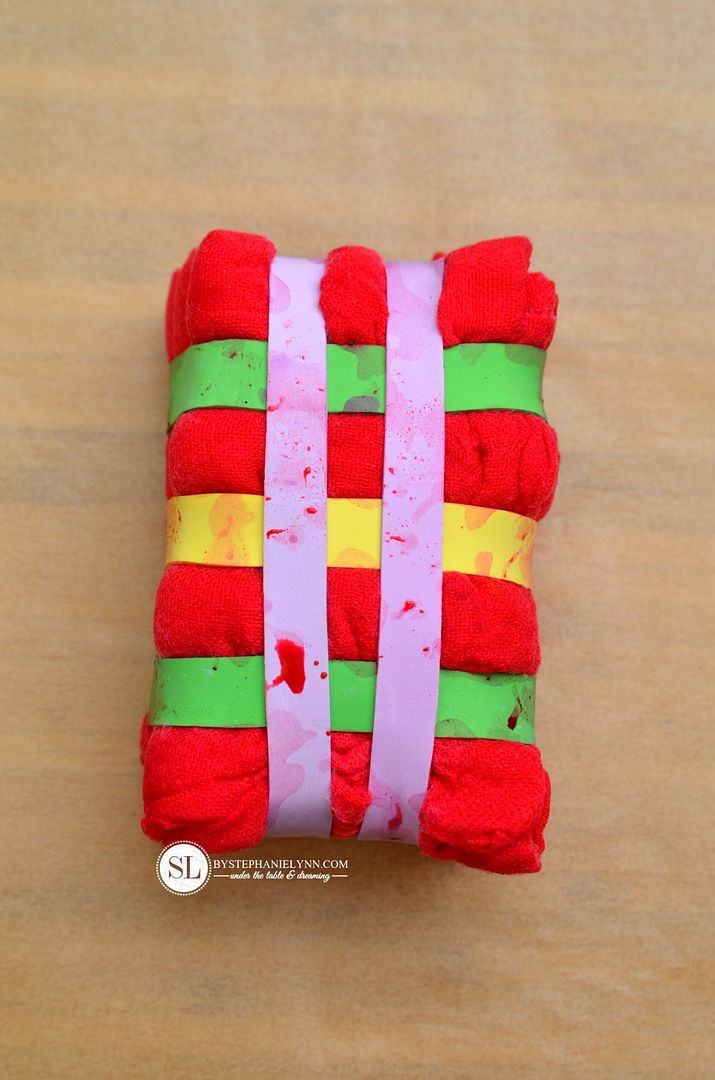
Accordion Folded Stripe Pattern Tie Dye Technique
Lay the fabric flat.
Accordion fold the fabric from the bottom up.
At this point you will have a long strip of fabric. Fold the fabric in half.
Secure the fabric with four rubber bands, evenly spaced as shown above.
Apply the dye to the fabric.
Flip the fabric over and repeat on the backside.
* For this particular design one color of dye was used. The dye was generously applied to each end section of the fabric, as well as the center section. The fabric was then flipped over and the dye was repeated on the backside.

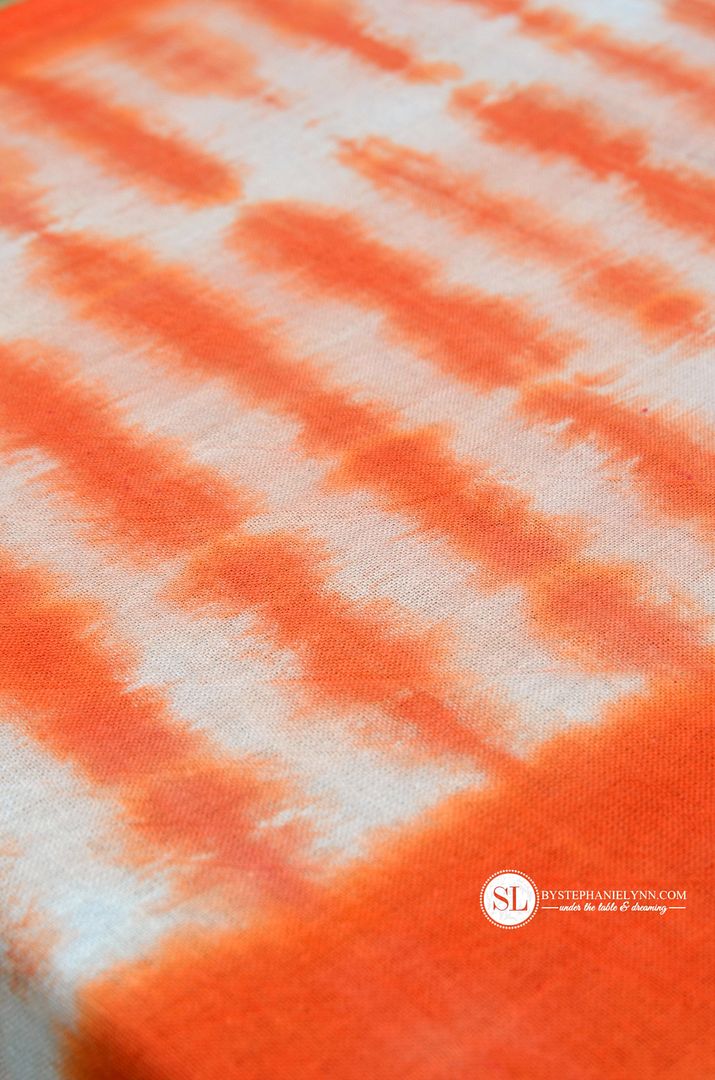
Accordion Folded Stripe Pattern Tie Dye Results

Folded Accordion Stripe Pattern Tie Dye Technique
Lay the fabric flat.
Accordion fold the fabric from the bottom up.
At this point you will have a long strip of fabric. Fold the fabric in half.
Then fold the fabric in half again.
Tightly secure the fabric with rubber bands.
Apply the dye to the fabric.
Flip the fabric over and repeat on the backside.
* For this particular design one color of dye was used. The dye was applied only to the outer edges of the folded fabric. The fabric was then flipped over and the dye was repeated on the backside.

Folded Accordion Stripe Pattern Tie Dye Results
Box Pattern Tie Dye Technique
Lay the fabric flat.
Accordion fold the fabric from the bottom up. This fold can be as wide as you like – ours was about 4 inches.
At this point you will have a long strip of fabric.
Turn the strip in a vertical position and fold the bottom edge of the fabric up, creating a square.
Using that square shape as a guide, repeat an accordion fold until you are left with a single 'square' of fabric – as shown above.
Tightly secure the fabric with rubber bands.
Apply the dye to the fabric.
Flip the fabric over and repeat on the backside.
* For this particular design one color of dye was used. The dye was heavily applied to the outer edges only, leaving the center untouched. The fabric was then flipped over and the dye was repeated on the backside.
Box Pattern Tie Dye Results
Banded Box Pattern Tie Dye Technique
Lay the fabric flat.
Accordion fold the fabric from the bottom up. This fold can be as wide as you like – ours was about 4 inches.
At this point you will have a long strip of fabric.
Turn the strip in a vertical position and fold the bottom edge of the fabric up, creating a box shape.
Using that box shape as a guide, repeat an accordion fold until you are left with a single 'box' of fabric – as shown above.
Tightly secure the boxed fabric with rubber bands.
Apply the dye to the fabric.
Flip the fabric over and repeat on the backside.
* This design utilizes the same folding technique as the box fold. The variance is in the rubber band placement and the dye application.
Banded Box Pattern Tie Dye Results

Simple Folded Pattern Tie Dye Technique
Lay the fabric flat.
Fold the fabric in half.
Fold the fabric in half again, then fold in half once more. At this point you will have a rectangle shape.
Accordion fold the fabric into thirds, back to front – front to back.
Tightly secure the fabric with rubber bands.
Apply the dye to the fabric.
Flip the fabric over and repeat on the backside.
* For this particular design one color of dye was used. The dye was applied to fabric, with a heavy application around the outer edges. The fabric was then flipped over and the dye was repeated on the backside. As the dye processes it will seep through the fabric and create an subtle ombre effect, as shown below.
Simple Folded Pattern Tie Dye Results

Accordion Folded Box Pattern Tie Dye Technique
Lay the fabric flat.
Accordion fold the fabric from the bottom up. This fold can be as wide as you like – ours was about 4 inches.
At this point you will have a long strip of fabric.
Turn the strip in a vertical position and fold the bottom edge of the fabric up, creating a box shape.
Using that box shape as a guide, repeat an accordion fold until you are left with a single 'box' of fabric – as shown above.
Tightly secure the boxed fabric with rubber bands.
Apply the dye to the fabric.
Flip the fabric over and repeat on the backside.
* This design utilizes the same folding technique as the box fold. The variance is in the rubber band placement and the dye application. For this particular design one color of dye was used. The dye was heavily applied to the outer edges only, leaving the center untouched. The fabric was then flipped over and the dye was repeated on the backside. As you can see in the photo above, the dye will seep through the fabric – making it appear as if the dye was applied to the entire surface. However, the rubber bands will prevent it from seeping through the center, leaving the ombre resist markings, shown in the photos below.
Accordion Folded Box Pattern Tie Dye Results

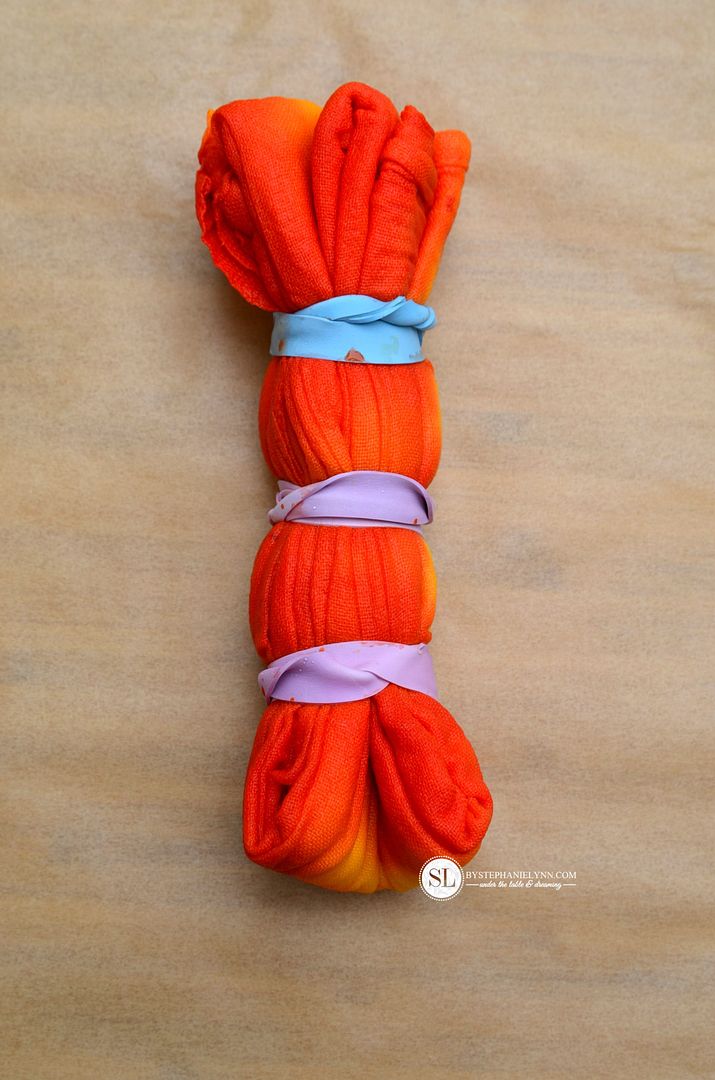
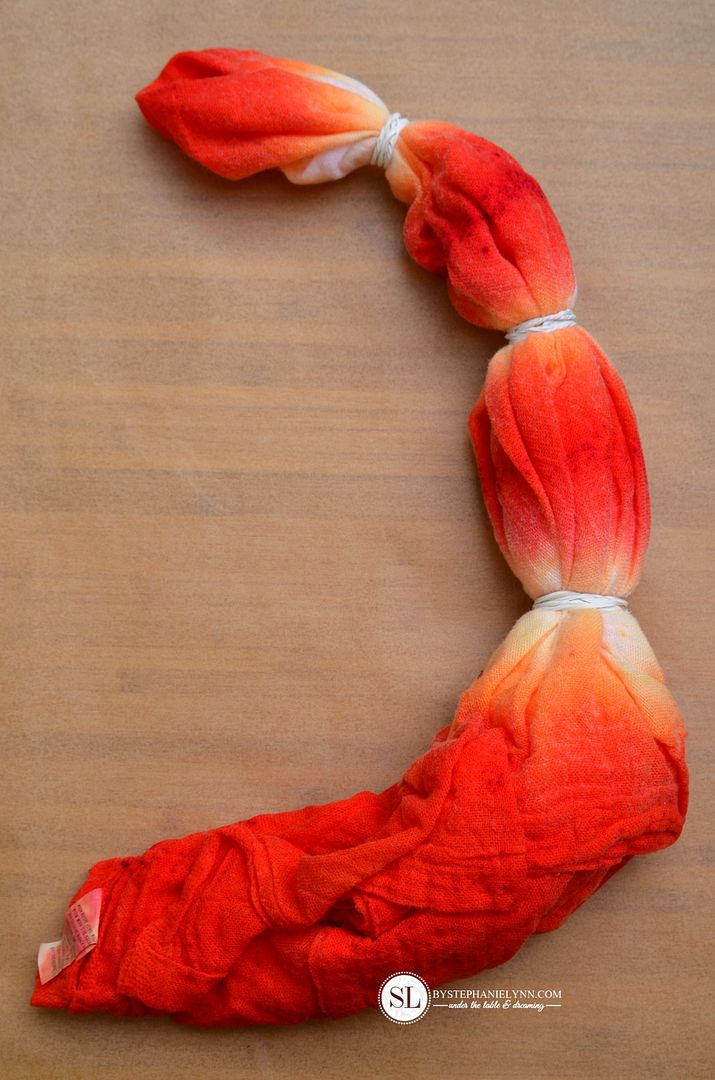
Two Step Accordion Fold Tie Dye Technique
Lay the fabric flat.
Fold the fabric in half.
Accordion fold the fabric from the bottom up.
Fold the fabric in half again.
Roll the edges inward, in a v-like shape and tightly secure the fabric with rubber bands.
Apply one color of dye to the fabric.
Flip the fabric over and repeat on the backside.
Let it sit and process.
Go back and apply a second color to the folded tips only.
* For this particular design, yellow dye was applied first, completely saturating the fabric. The fabric was then flipped over and the dye was repeated on the backside. That was left to sit and process for 24 hours. With the fabric left banded together, it was then rinsed under cold water – until the water ran clear. While the fabric was still wet (and banded together) orange dye was then applied to the folded tips only – as shown above.

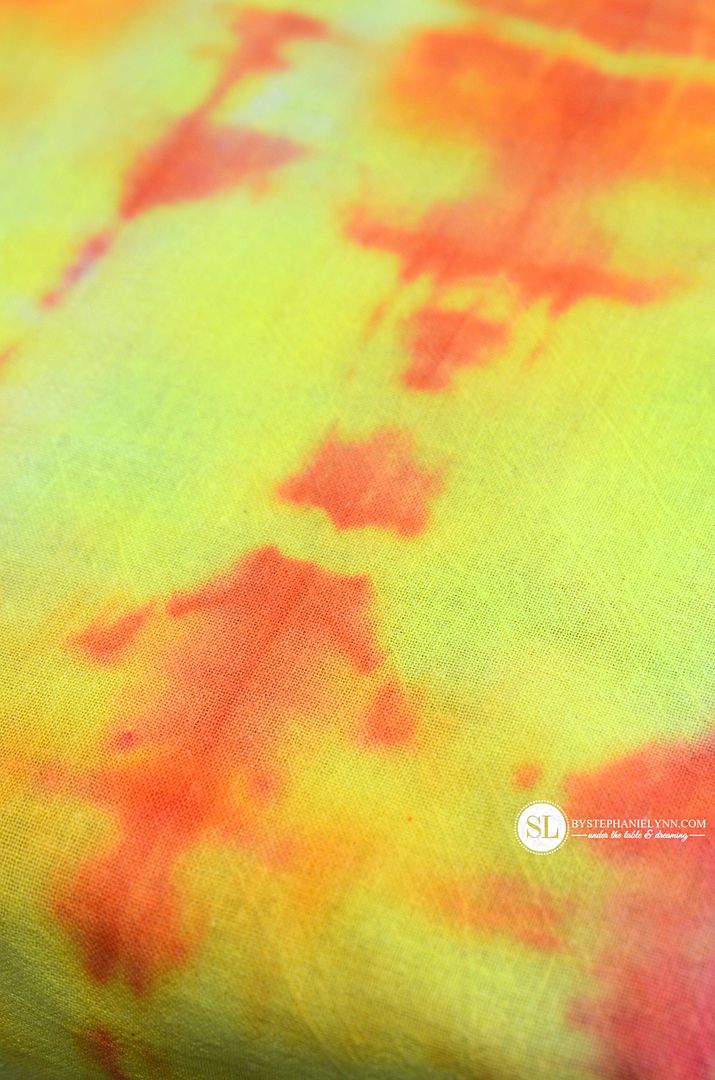
Two Step Accordion Fold Tie Dye Results
**All of the designs shown above were placed in a plastic bag, sealed, and left to process for 24 – 26 hours**
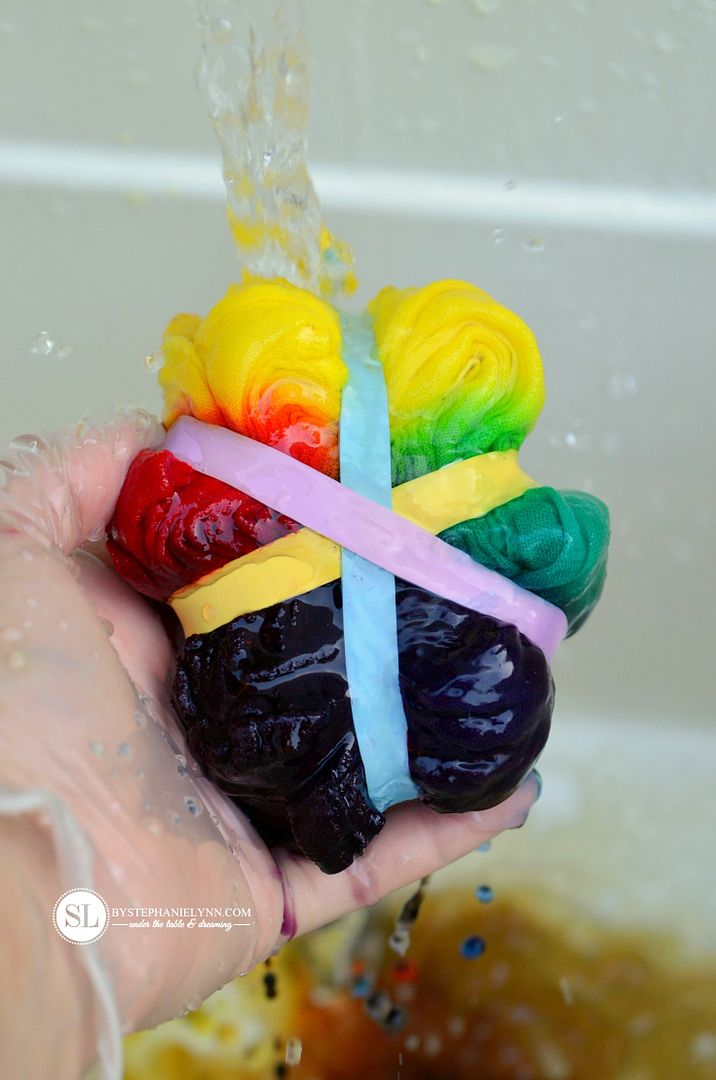
Rinsing out the processed tie dyed projects is a simple task.
Remove the fabric from the bag and run under cold water in a sink.
With the water running, gently squeeze the fabric to release as much of the dye as possible.
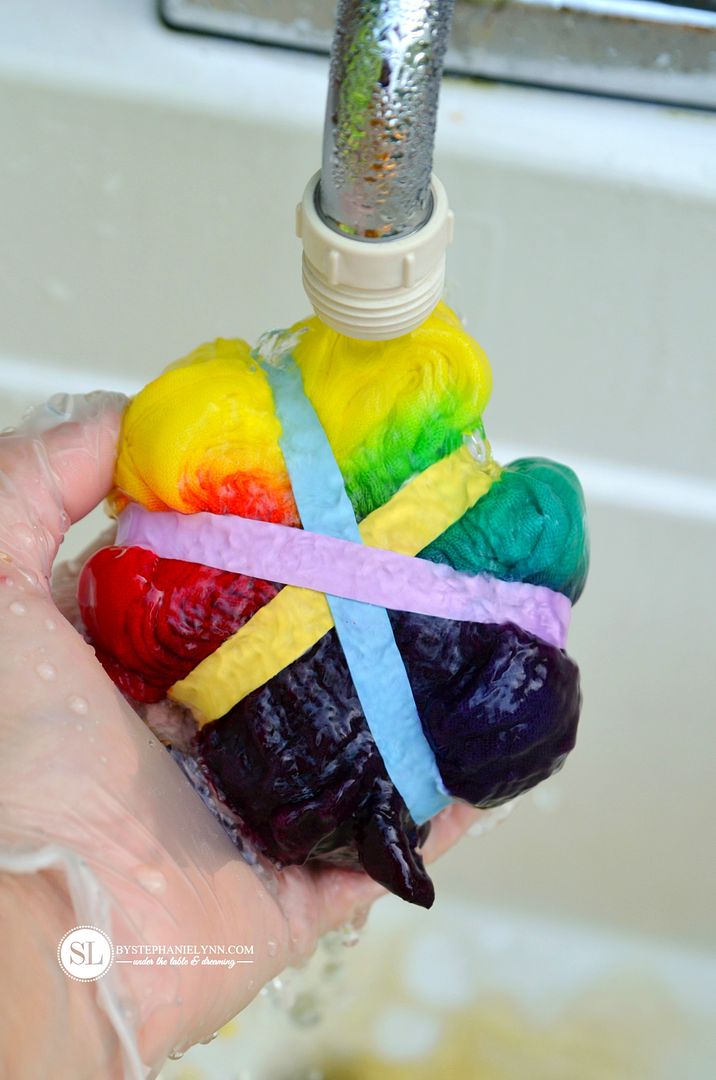
Flip the fabric over and continue rinsing, until the water just about runs clear.
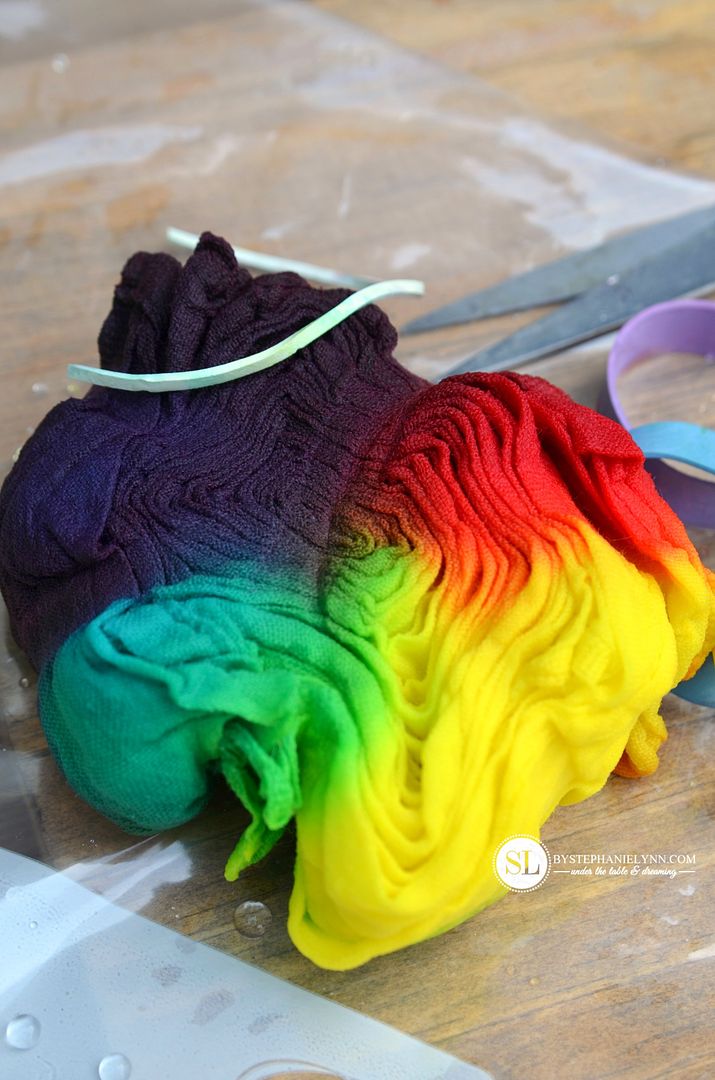
Lay the fabric on a protective surface and remove the rubber bands. A pair of scissors comes in handy to cut any bands that are tightly secured.
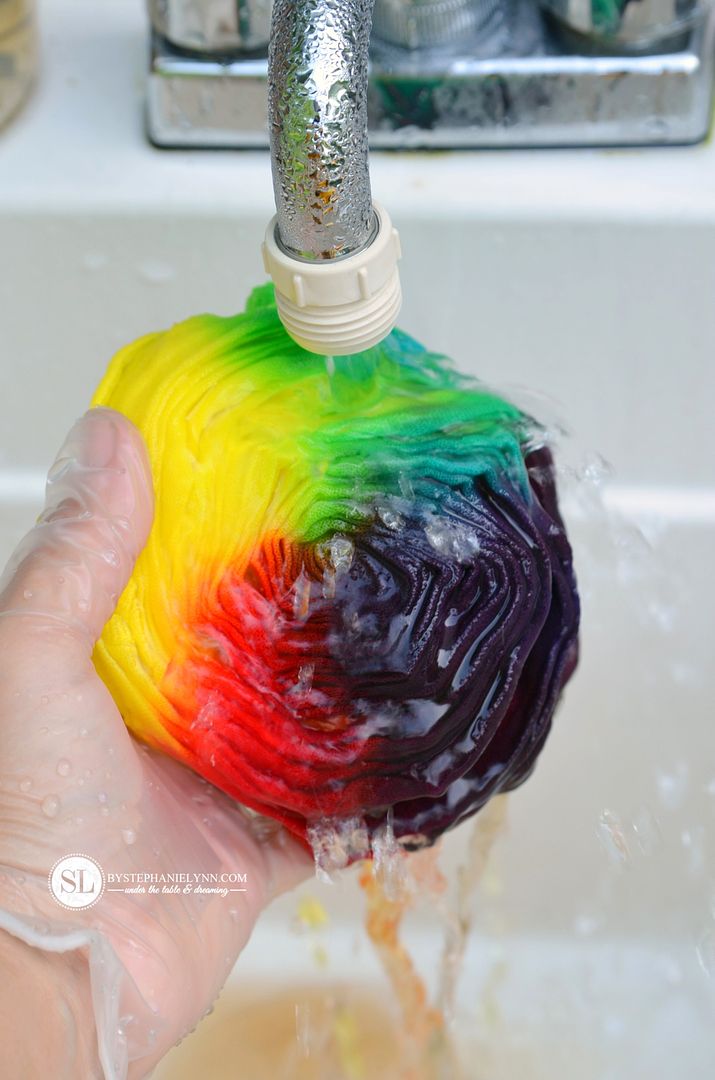
Place the fabric back under the running cold water and continue to rinse – unfolding the fabric as you go.
The fabric should be rinse throughly until the water runs clear of any dye.
From the sink, we hung our wet fabric outside to dry prior to washing. This helps with tracking any drips throughout the house as you make your way to washing machine.
Since these were tea towels, they were ran through the wash several times prior to using in the kitchen.
We did this outside in a white utility sink and no trace of dye was left in the sink when we were finished.


. The opinions read here are entirely my own. Join Michaels as they kick off summer – with the Tulip One-Step Tie Dye Party Kit! Throw a full tie dye party, tie dye t-shirts, or simply tie die your own creations! The full kit is available in stores and additional tie dye products can be found on Michaels.com. This season don't forget to share your very own tie dye party creations on social using #TieDyeYourSummer. We can't wait to see what you come up with!

Different Types of Tie Dye Knots
Source: http://www.bystephanielynn.com/2015/06/tie-dye-folding-techniques-16-vibrant-tie-dye-patterns-tiedyeyoursummer.html